

Pat Callinan (aka Mr 4X4) take you step-by-step through of his ultimate 4X4 (Amarok V6) from the chassis extension, lift, canopy and world’s greatest beer keg install.
The documentary ‘Building the Ultimate 4X4’ will air on Network TEN in Australia on Jan 19, 2020.
Every big idea starts with a ‘why?’ Though this project started with more of a ‘why not’? With a glut of heavily modified Toyotas being trotted out at 4X4 shows, I asked myself the question: ‘Why no Amarok’s?’
Sure, their conservative styling doesn’t always lend itself to the show scene like the brutish looks of a 79 Series or a RAM. However, the bones, well, the bones are, in my opinion, particularly strong. Your regular dual-cab has five cross-members in the chassis. The Amarok has seven on a hydro-formed chassis. It’s rather strong.
And that 200kW diesel engine in the new 580 model is particularly tasty, especially when matched with an eight-speed auto and paddle-shifters on the steering wheel. Those 79 Series could only dream of that. But of course, I am sponsored by Volkswagen Commercial, so I’d be lying if I said that didn’t play a part in my motivation. Well that, and the fact that I like doing stuff that others haven’t done before.
Yet every mid-sized dual cab has its limitations. Load up the back end with something substantial, and you risk either chassis stress or vehicle imbalance. The latter is a tough one to overcome. Sure, you can throw in airbags or heavy-duty springs, but you’re simply masking physics. Head up a steep hill, and your front will be light and floaty, making you pop front tyres over the smallest of holes. Nope, far better to put the wheels further towards the back.
THE CHASSIS EXTENSION
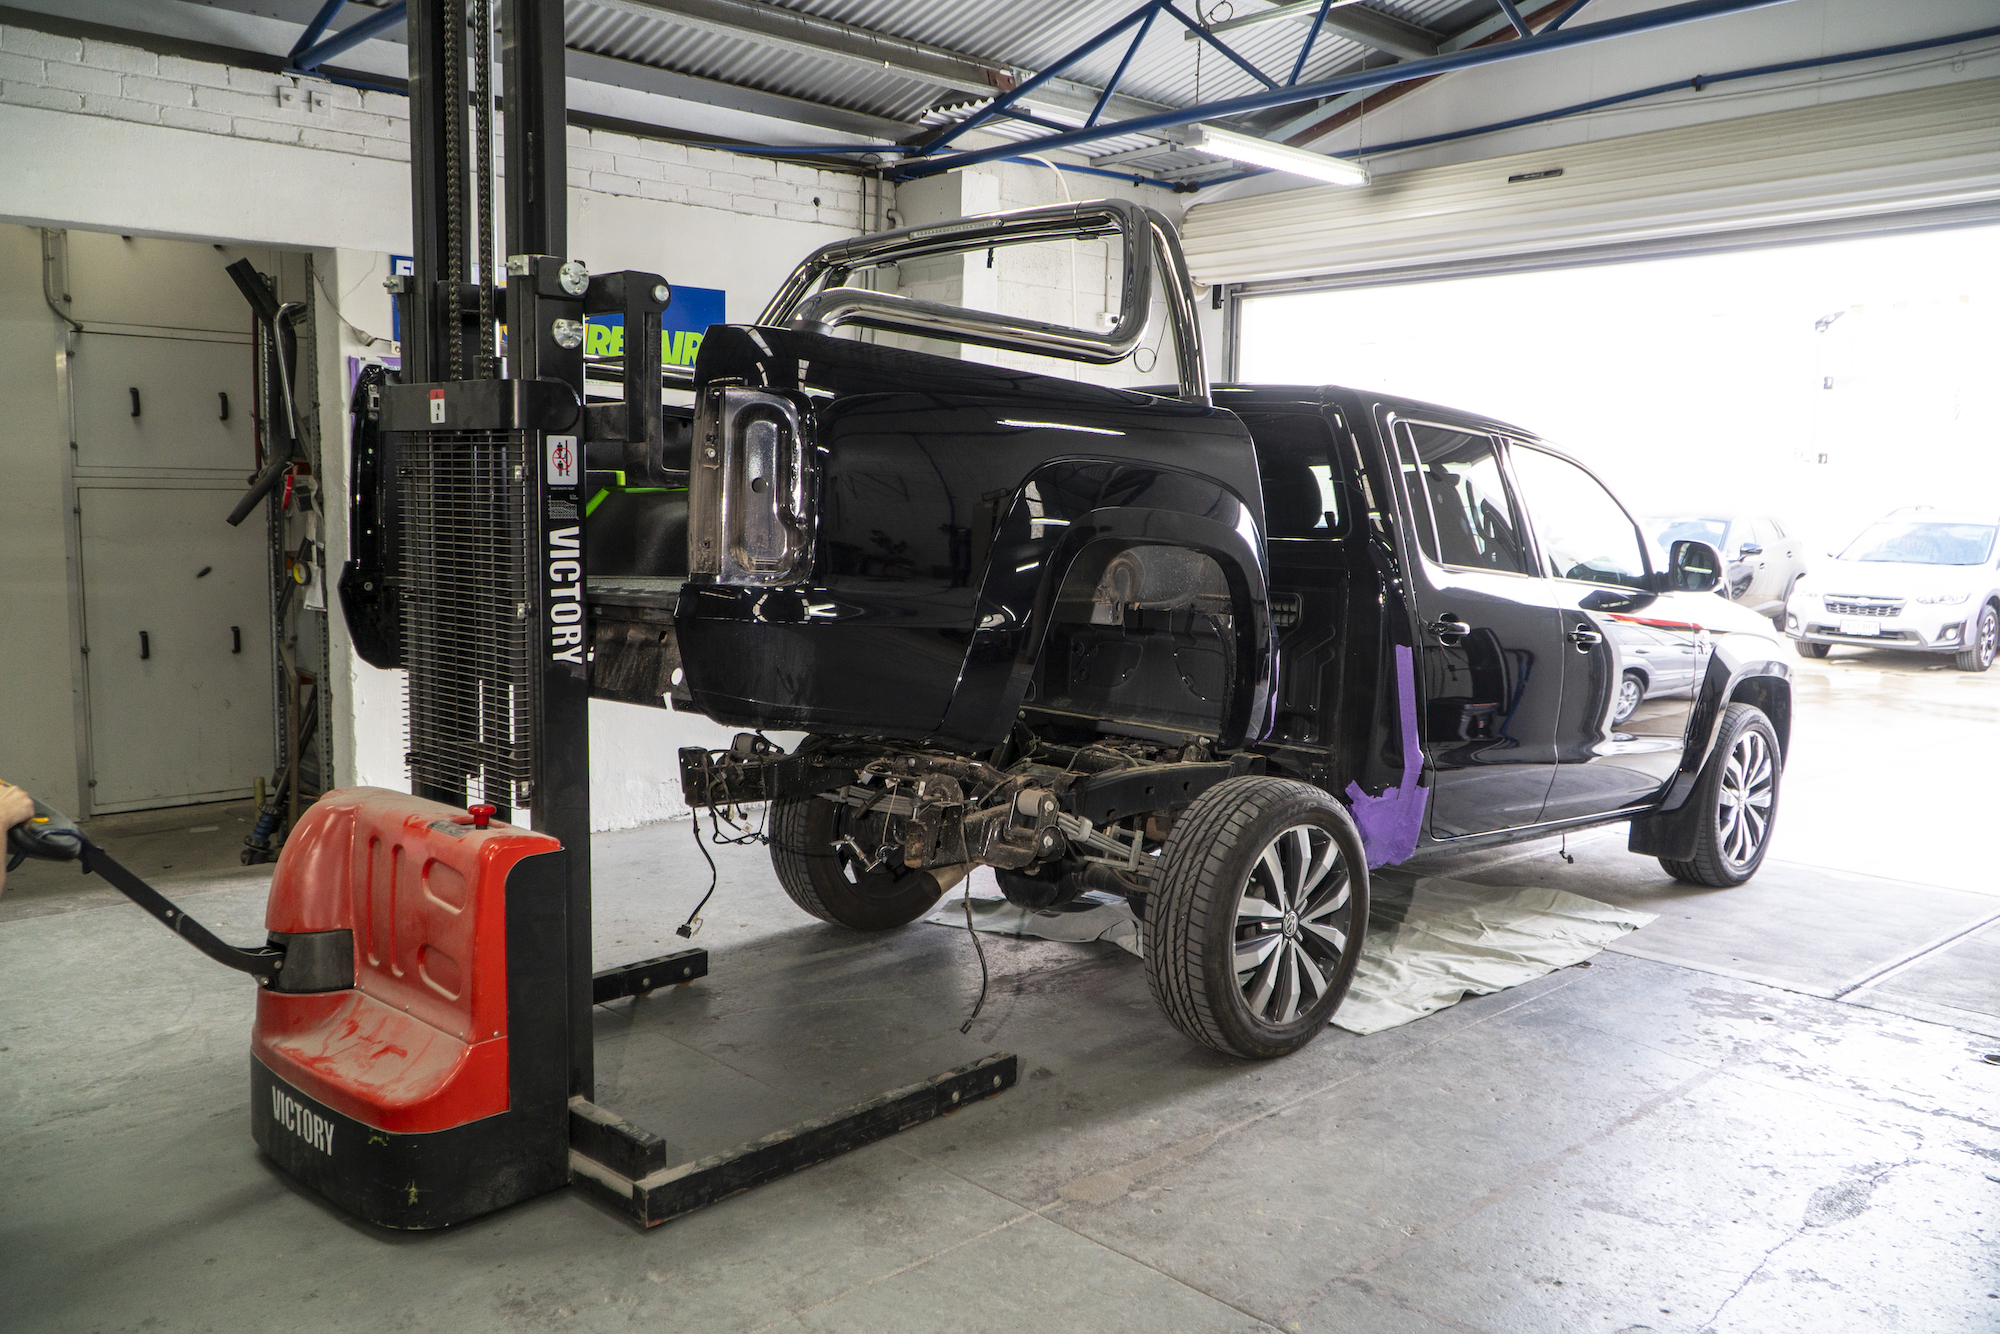
The chassis extension is more involved than you might think, but the results were outstanding. Adaptive Manufacturing, headed up by Peter Eblen, ensured mine was the first XXL Amarok in Australia.A longer chassis would allow all sorts of possibilities; more room in the back, and better balance. But it would create issues too. The ramp-over angle would be jeopardized. The first few days of research uncovered that Volkswagen actually offered extended chassis in other countries. In Europe, they have been using them as ambulances for the past few years. New Zealand has also been using this VW sanctioned kit.
There are two extensions on offer, the 310mm XL extension, and the 650mm XXL. The kit itself is manufactured in the Netherlands by a company called Veth, and then welded in place by local companies. The bonus of this kit is that not only is it well-engineered (getting the sign-off from VW in Wolfsburg), it’s also covered by a factory warranty. Not to mention the ABS, AdBlue and traction control is modified to suit the longer wheelbases – a major bonus as the safety of the original vehicle carries through.
I chose the 650mm XXL extension, and this included an additional two cross-members in the chassis. She now has a whopping nine cross-members. And of course, the tail shaft was extended to suit the extra 650mm. My original tail shaft was sent away and extended, rather than using a brand new one.
Adelaide-based company Adaptive Manufacturing has the exclusive contract to build Australian chassis extensions, and they are busily setting up workshops around the country to cope with the demand.
Early 2020 will see these kits available through VW dealers, and my guess is pricing between $9K and $15K depending on whether you want an extended tub or not. If you’re happy with a cab-chassis, you’ll save a few bob to put towards your tray. And with the advent of the new manual V6, you could potentially drive away in an extended Amarok for around $60K – which is incredible value in my opinion.
LIFT, WHEELS, RUBBER & RECOVERY POINTS
If you bother to Google a standard Amarok with a 650mm extension, it looks downright scary. Put it this way; it would make a great hearse. The belly hangs sausage dog low, which is fine for on-road pursuits, but not where I want to go. Lift was of the utmost importance to fix that rampover angle.
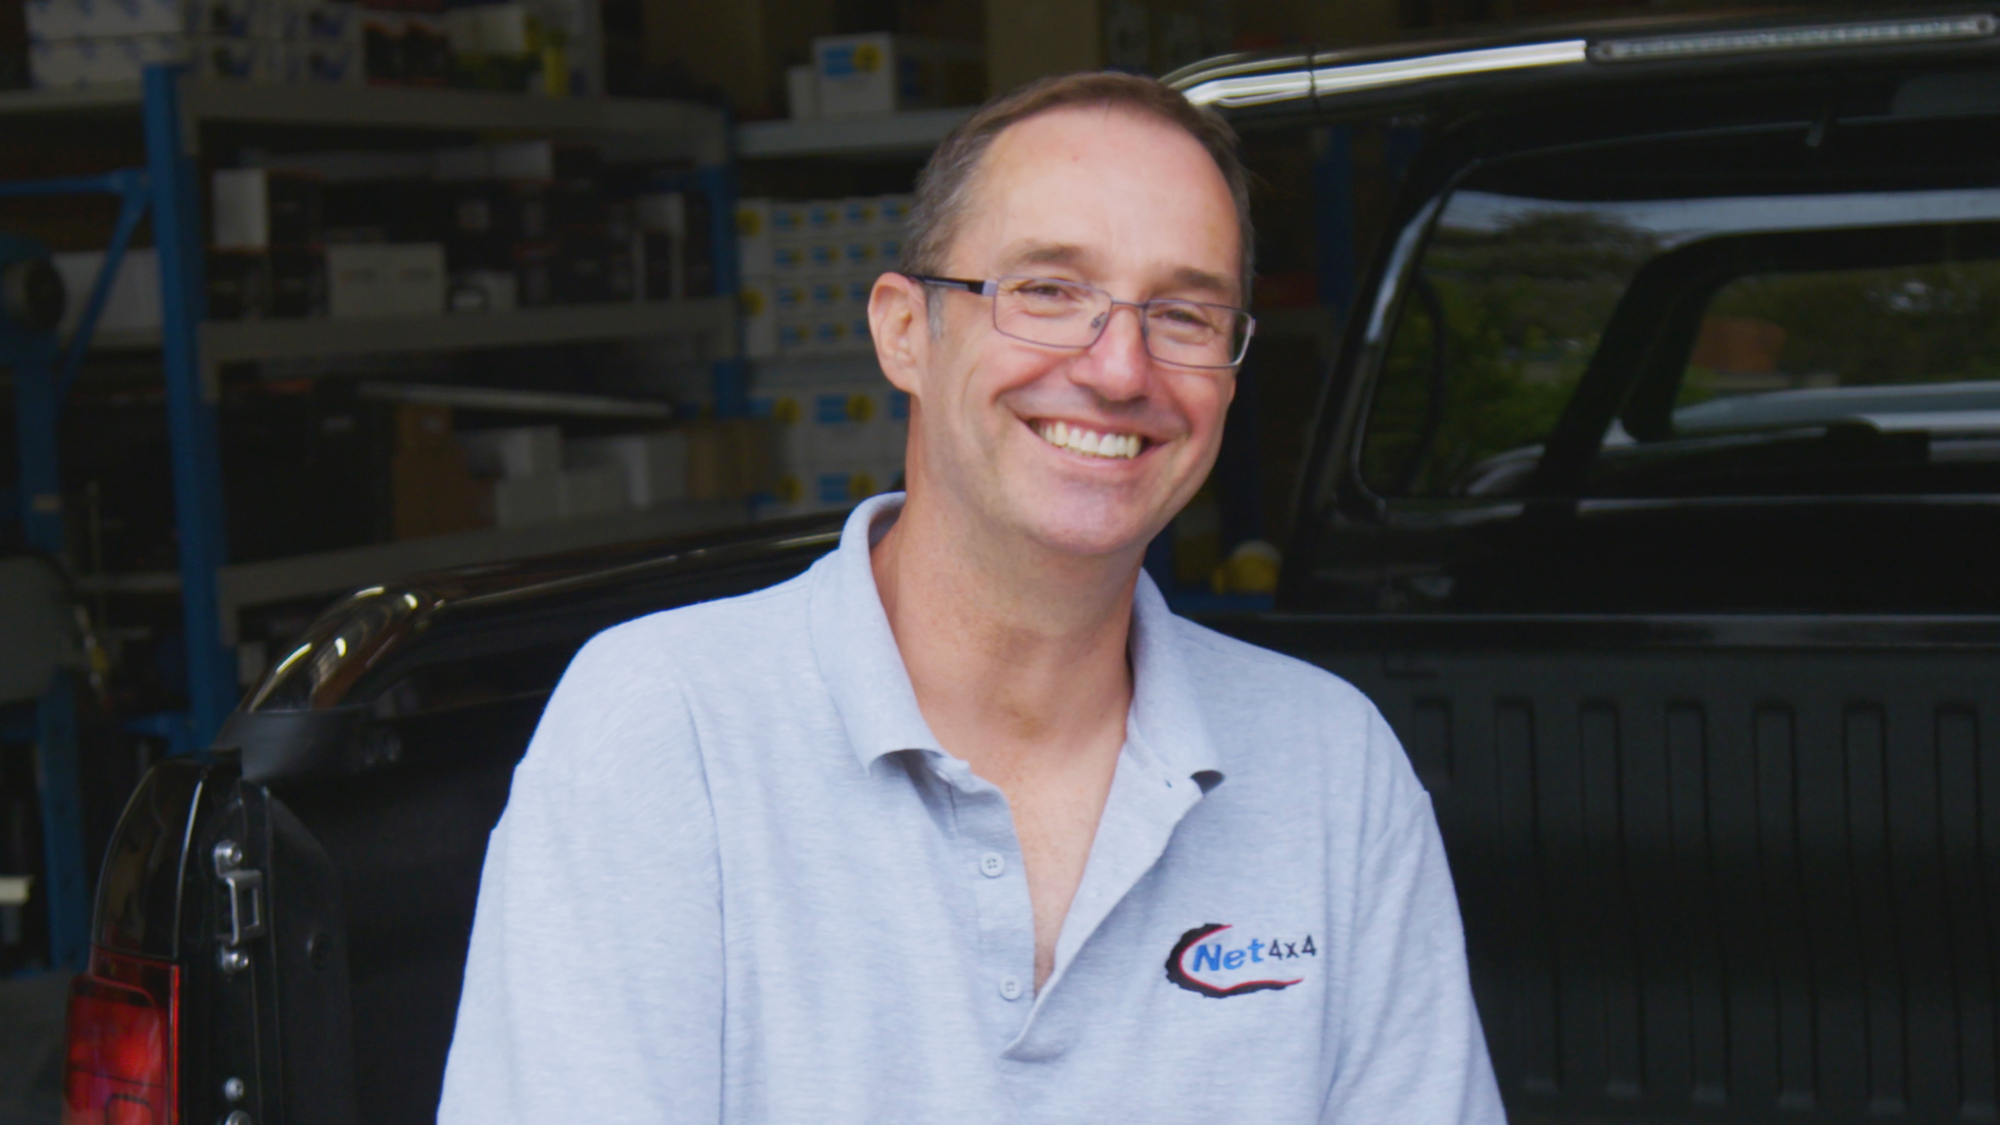
The Ultimate Amarok then went to Melbourne, landed in the capable hands of Mark Dirnbauer from Net 4X4. Mark operates out of his sizeable back shed, and he’s known for his encyclopaedic knowledge of all things Amarok. In fact, he often gets calls from dealers trying to troubleshoot tech solutions.
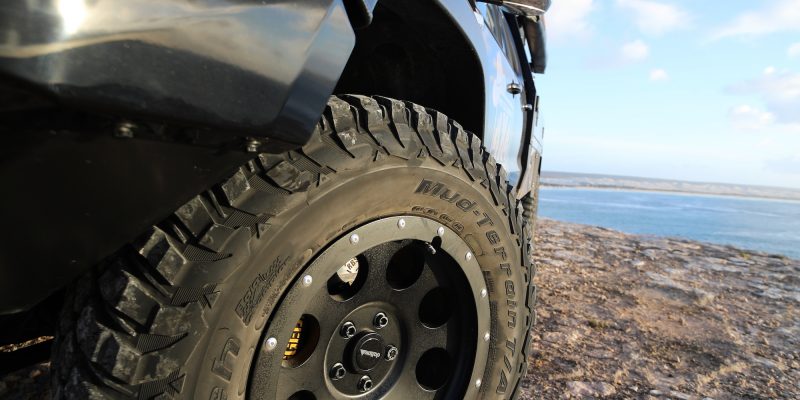
The brief I gave Mark was pretty simple. Please fit these 35 x 12.5/18 BF Goodrich KM3s. Oh and make it so they don’t rub and are street legal. That last bit was the kicker. There are a few sneaky Amaroks running around the country with 35-inch rubber, but I’m not too sure they’ve been engineered.
Mark began the process by first lifting the vehicle. The body was lifted off the chassis by 43mm, using a Southern Cross Fabworks kit. 43mm is the magic number you can lift an Amarok, before needing to conduct major surgery on things like brake lines and electrical links.
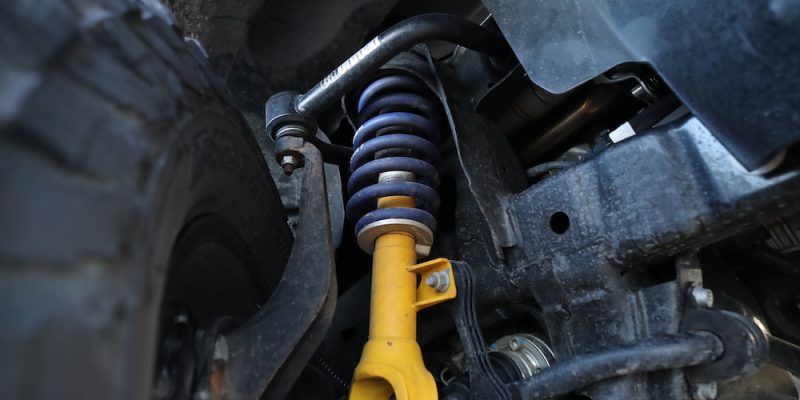
Next up was the rather large suspension lift, using a Net 4X4 kit. Mark uses H&R cold-wound heavy-duty coils to account for the weight of the bar and winch combo, and the struts feature a 14mm top thread. This increases the strength by 60% over a regular 12mm top thread. The seat height is adjustable too, so you can compensate for additional lift or load later on. Net 4X4 also has its own dampening rates dialled into the Bilstein struts. So while other setups look similar, the result will be different.
New upper control arms have also been fitted, which create increased clearance for the rims and tyres. The UCAs also have additional camber and caster built into them. And being tubular, they’re strong and don’t flex. Plus they feature a greaseable upper ball joint, an improvement over the standard offering.
To lift a vehicle to this extent (we’re talking around three inches of suspension lift) and to not fit a diff drop kit would be sacrilege.
Essentially, we would have no down travel in the suspension and our CV joint would be at maximum extension. So, a Net 4X4 diff-drop kit was installed to the new rig’s front end, getting the geometry back to normal.
The rear suspension was far simpler. The Amarok leaf springs are set differently to all other dual cabs, in that they’re mounted outside of the chassis (as opposed to directly underneath). This allows a multitude of advantages, including better load carrying and articulation, better ride and of course more room in the tub. They literally ride like coils. I upgraded the springs to 500kg heavy-duty Net 4X4 leaf springs, which gave the height and load carrying required. The springs are mounted to the chassis using polyurethane bushes.
The rear shock absorbers were also upgraded to suit the additional height, and measure 125mm taller than standard. Mark likes to use Bilstein shocks damped to his own specifications. They’re a monotube construction. The issue here is that unlike twin-tube shocks (like Old Man Emu), they lack a protective layer and if dented simply won’t work. This is an issue with Amarok’s, as their shocks are mounted forward of the axle, making them susceptible to rock strike. To solve this, Mark beefed up the shock wall to a 3mm wall (as opposed to the 2mm regular wall), which saves on the need for a stone guard.
Now that the vehicle was lifted, we made the choice to fit Delta 4X4 Klassik 18×9-inch wheels with a cosmetic beadlock. I’m a fan of the look of these wheels, but it was more than looks that made me fit them. You see, the +20 offset is sort of the magical number we were after to make the tyres fit, and not rub in their arc. On top of that, I like the fact that the Delta rims retain the original wheel studs (I’m not a fan of aftermarket ones requiring the use of weird thin-walled sockets.
So, with the big BF Goodrich KM3 muddies mounted and the suspension angles sorted, Mark now had the ability to see how this affected the arc of the steering. Any Amarok enthusiast will know – it affects it A LOT. The tyre was essentially touching the back of the guard, so Mark trimmed, trimmed, and then trimmed some more. A whopping 47mm was taken out, allowing the steered wheels almost their full range of movement. I say almost, because Mark also installed steering restrictors to stop the tyre rubbing on the chassis rail. The loss of steering movement is negligible.
The inner-wheel liners were also heavily modified to fit the tyres, and a wedge was cut out near the floor pan of the Amarok. Bushwacker flares were installed, but rather than mount them the traditional way; Net 4X4 used nutserts to bolt them directly to the body. This way, they won’t come adrift mid water-crossing. Again, there’s that attention to detail.
I’d normally go to my local ARB to get the Summit bullbar and Bushranger REVO 10000lb winch mounted, but with the body lift, came issues. Bolting the winch bar straight in would reveal an ugly 43mm gap, and a less than ideal approach angle. Fabricator extraordinaire Mark got to work building new mounts to suit the body-lifted Rok, integrating crumple zones for ADR compliance. Nice. The stone guards from the ARB bullbar were also reshaped in line with the additional body lift.
Mark also installed a pair of his original-design Net 4X4 recovery points. Rated at six tonne, yet tested to 20 tonnes, these are the Dwayne Johnson of recovery hooks. Better still, when they reach capacity, they’re designed to shear a bolt, rather than coming away from the body; an early-warning system of sorts. No other recovery points come close.
At the rear of the Amarok, my unique back end ensured that I needed one-off recovery points fabricated, so I went to a local fabricator to get them made up. I requested he angle the hooks, as I plan to always use a recovery bridle on the back end.
One of Mark’s final jobs was to install one of his ‘plug-and-play’ high-beam triggers. You would normally have to cut the wiring loom and tap in, but with Mark’s Net 4X4 kit, you don’t have to. It simply uses a male to female plug.
If you’re wondering about the cost of these extensive mods and installations at Net 4X4, it tallies at around $19,000. Yet a lot of that is due to the ‘first-time’ learnings. Mark reckons he could shave around $10K off that number should he have another vehicle requiring the same mods, which is solid value in my books.
While the 580 Amarok was in Melbourne, the Clearview team whipped into action, installing their first set of Power Boards to an Amarok. These sidesteps fold down as you open the door, and retract when the door closes.
Given the significant height increase on the Amarok, they’re at the perfect height for stepping in and out of the Rok. They don’t offer the same protection as regular rock sliders, but they do sit higher, as they’re body-mounted, as opposed to chassis-mounted. For me, they’re perfect. The body lift did mean that they don’t fit the vehicle quite as tightly as they would a regular Amarok, but I’m happy with them all the same.
ENGINEERING & GVM UPGRADES
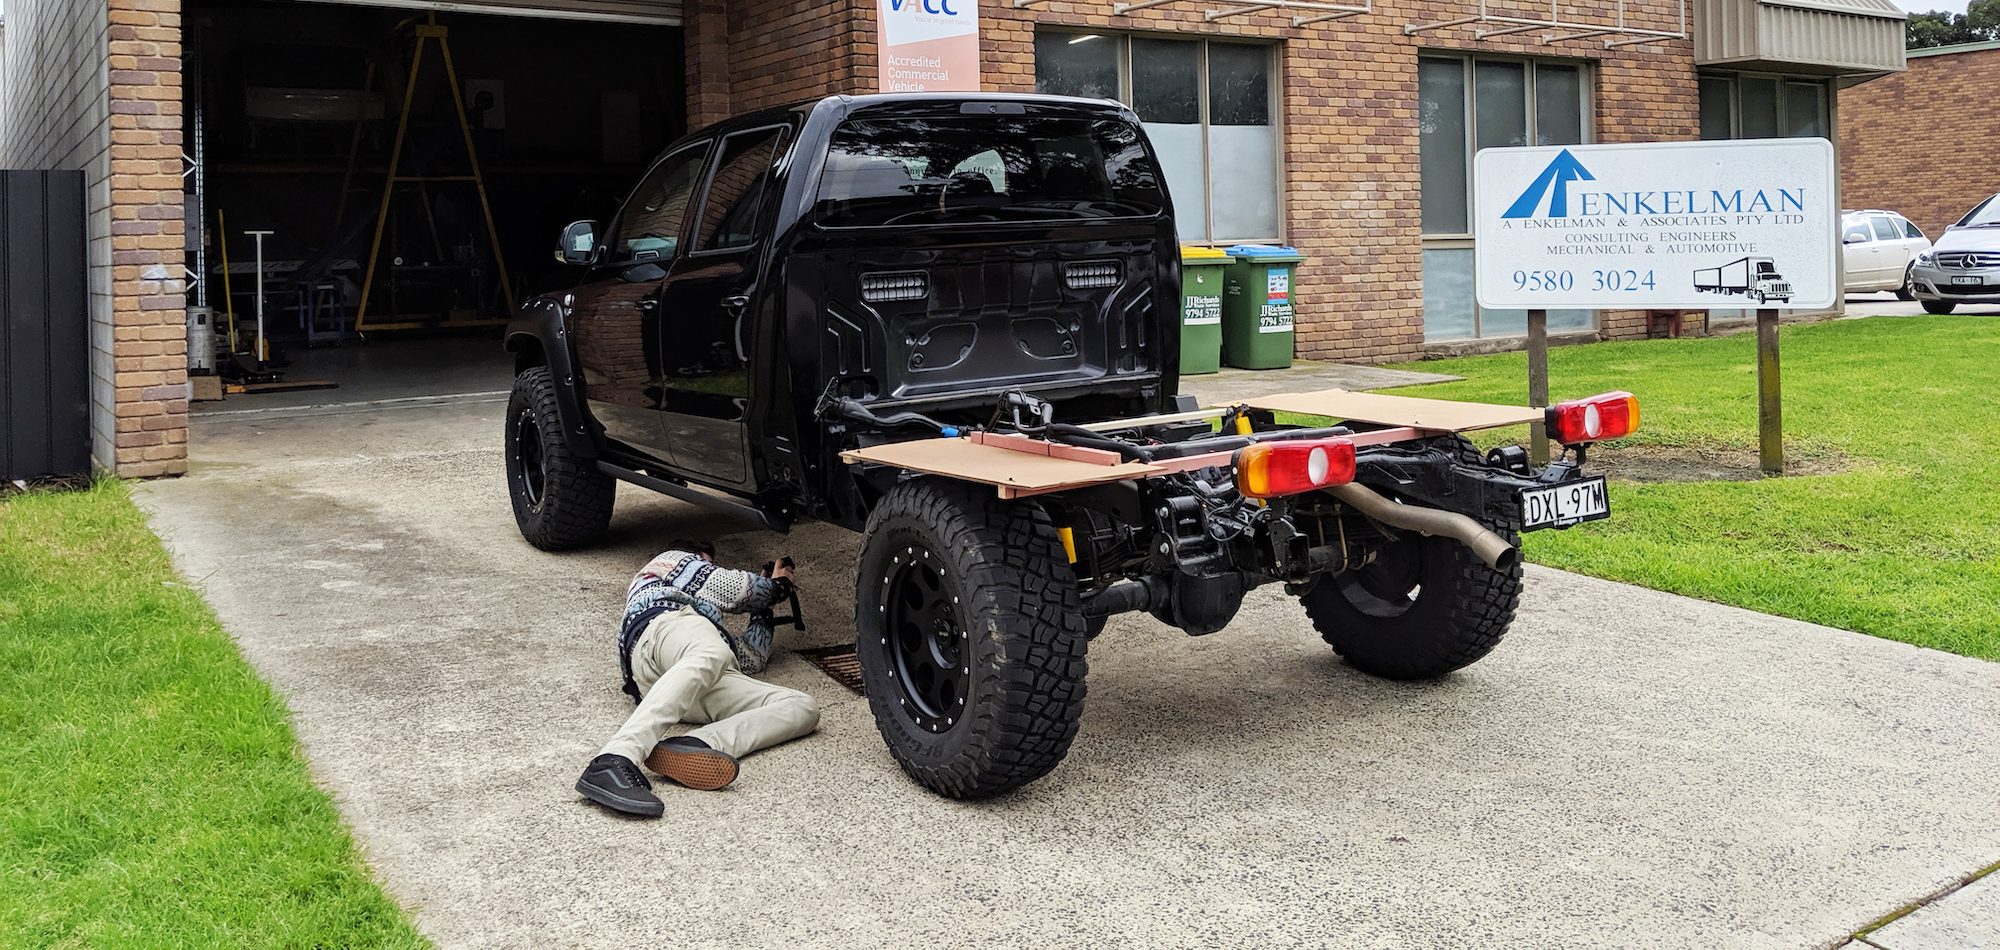
Most four-wheel drivers appreciate that around five inches of overall lift is beyond the bounds of legalities. However, there are ways around this, albeit expensive detours. My Amarok had to undergo second-stage manufacturing compliance. This basically means than an engineer has to treat the vehicle as if it’s a one-off and go through absolutely all aspects of the vehicle. From the location of the lights, to the braking performance to the handling and speedo calibration. It’s an exhaustive process. Tom from A. Enkelman & Associates was my engineer, and he was chosen as he has signed off on Net 4X4 GVM upgrades in the past. He’s also very familiar with second-stage compliance, having dealt with a number of heavily modified 4WDs in the past.
The testing itself would occur at the AARC Automotive Proving Ground near Anglesea. Yet before the Amarok arrived there, it would have to be prepped. Sensors were strewn all over the vehicle to assess things like body roll and brake temperatures. Inside the car was a ruggedized laptop computer recording everything live.
To simulate a load, 1.2 tonnes of shot bags were loaded into the tub and strapped down. All testing would be done with the vehicle fully laden.
The weather gods didn’t smile on us that day. We were met with a cold drizzly day – not the time to see how your 35-inch muddies grip on wet bitumen for the first time. The brake tests were first, and time after time, she pulled up straight and true. Phew – first test passed. Then some more mundane tests were performed, as the handbrake was tested on various degree inclines. Again – easy pass.
We had delayed the all-important swerve testing until after lunch, hoping that the weather would clear and we would have a dry track. It didn’t work. If anything, the drizzle became more persistent and the track was streaming wet. But Tom was happy to push on. The swerve test involves building up to a speed of 100km/h, hooking a sharp left, then straightening through a set of cones. He began at around 80km/h to get the feel of the Amarok. Pleased with that, he pushed to 90km/h. Then, he hammered through the cones at 100km/h in the 3.4-tonne Amarok. She flew through with minimal body roll. Tom was visibly thrilled. He mentioned that when he does these tests in 79 Series, it can be a scary affair, but the Amarok nailed it. “I could have gone through at 110,” he remarked.
Part of the engineering requirement for me was a request to increase the Gross Vehicle Mass (or GVM).
There’s no point having a longer, stronger vehicle if it’s not legal on the roads. So Tom managed to increase the GVM from 3080kg, to 3650kg, a 570kg upgrade via the Net 4X4 suspension kit. I should also mention that Mark from Net 4X4 offers GVM upgrade kits for Amarok’s and that he did most of the liaising with the engineer in Melbourne.
For the record, if you’re like me and are the first to modify a vehicle with the tyres, vehicle, chassis and suspension I have, the engineering cost will be around the $10-$12K mark. But if you can purchase a GVM upgrade suspension kit or indeed an extended chassis from the dealer, those costs will probably halve.
FULL CUSTOM CANOPY AND ELECTRICS
After the chassis extension in Adelaide, and suspension and body lift were completed, it was time to head to Brisbane, to the outer southern suburb of Crestmead. This is the home of Camp King, a small but rapidly growing Aussie company known for their rooftop tents and canopies. What attracted me initially were the lines on their canopies and the quality of their tents. Not only do they look cool, they’re lightweight and strong, being based around aluminium. We had previously tested a Camp King canopy on our (standard wheelbase) crew Amarok, and it worked a treat. Yet this would be different.
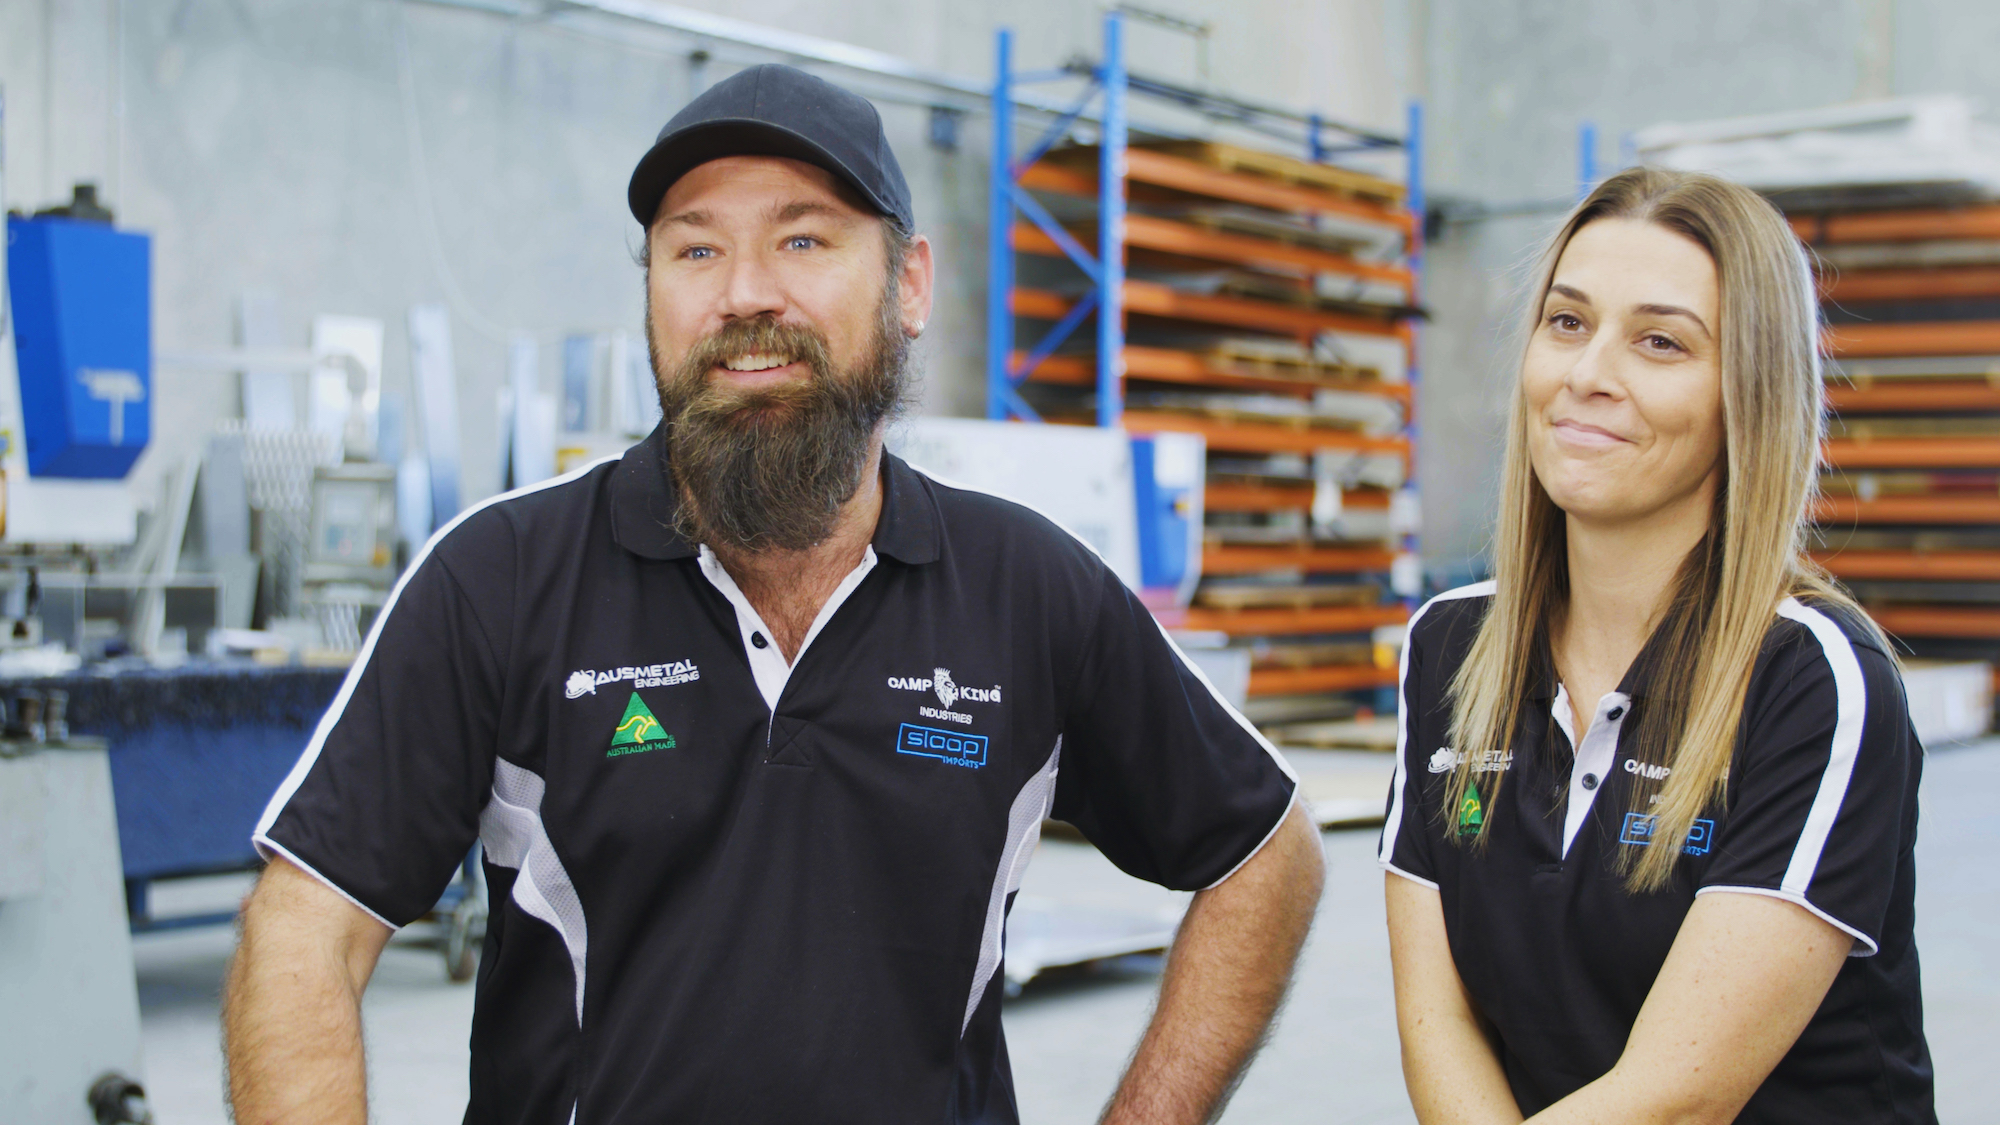
I sat down with Lucas and Sarah and explained this whole ‘Ultimate Amarok’ concept, half expecting them to show me the door. They didn’t. They relished the opportunity to showcase the skills of their team. I had a few strange requests, but rather than stifle their creativity, I let them run with it. After all, these guys and gals are Queensland campers and four-wheel-drive natives, so they understand what was required. I sent them a Breville coffee machine, four Revolution Lithium batteries, a diesel heater, half a Redarc catalogue and, umm, a commercial beer keg with a 2.6kg CO2 bottle. It was their job to try and make it all fit.
It might surprise you that a canopy build like this is not all that different to building a tiny house. CAD software is employed, draftsmen draw it all up and then it’s up to the skilled sheet-metal fabricators to fold and stitch it all together. Much of this happened while I was away crossing deserts, so when I came back to see the canopy mounted on the Amarok, I was simply blown away. The first thing you’ll notice is the way the canopy is integrated into the lines of the Amarok. It’s superb. The headboard wraps around the cabin in such a way that it looks like it’s part of the vehicle. So much so that I’ve had plenty of people assume that this is a VW factory build. The headboard is functional too, with fillers for the water tank, AdBlue and diesel all housed nicely here.
The departure angle is outstanding too, and it looks akin to a ‘bobbed’ 4X4 thanks to the sharp-angled storage boxes on the back end. There’s also a large under-tray storage drawer in the rear, housing the recovery gear.
The roof pivots up and uses the regular Camp King rooftop tent design. A generous-sized super-long tent with a lined roof to stop condensation. There are also a couple of USB outlets to keep the phone charged overnight. Oh, and I did make a few tweaks to the interior. I got a print made up of an old Rank Arena styled TV, with a white screen so I can run a projector inside. I found a little USB powered projector for about $400 (PICO brand), and I can watch all the Netflix I like.
The Camp King team also integrated a neat little bulkhead that houses inlet and outlet vents for the Webasto diesel heater. There’s a thermostat dial in there too, so I can adjust the temperature. Knowing full-well I could have installed a $26 eBay 12-volt electric blanket, I knew this was overkill. But on the few chilly nights I’ve slept in it, I have to say that it is absolutely awesome. In fact, I’ll be doing a lot more winter camping as a result. No more beanies in bed and head under the doona for me.
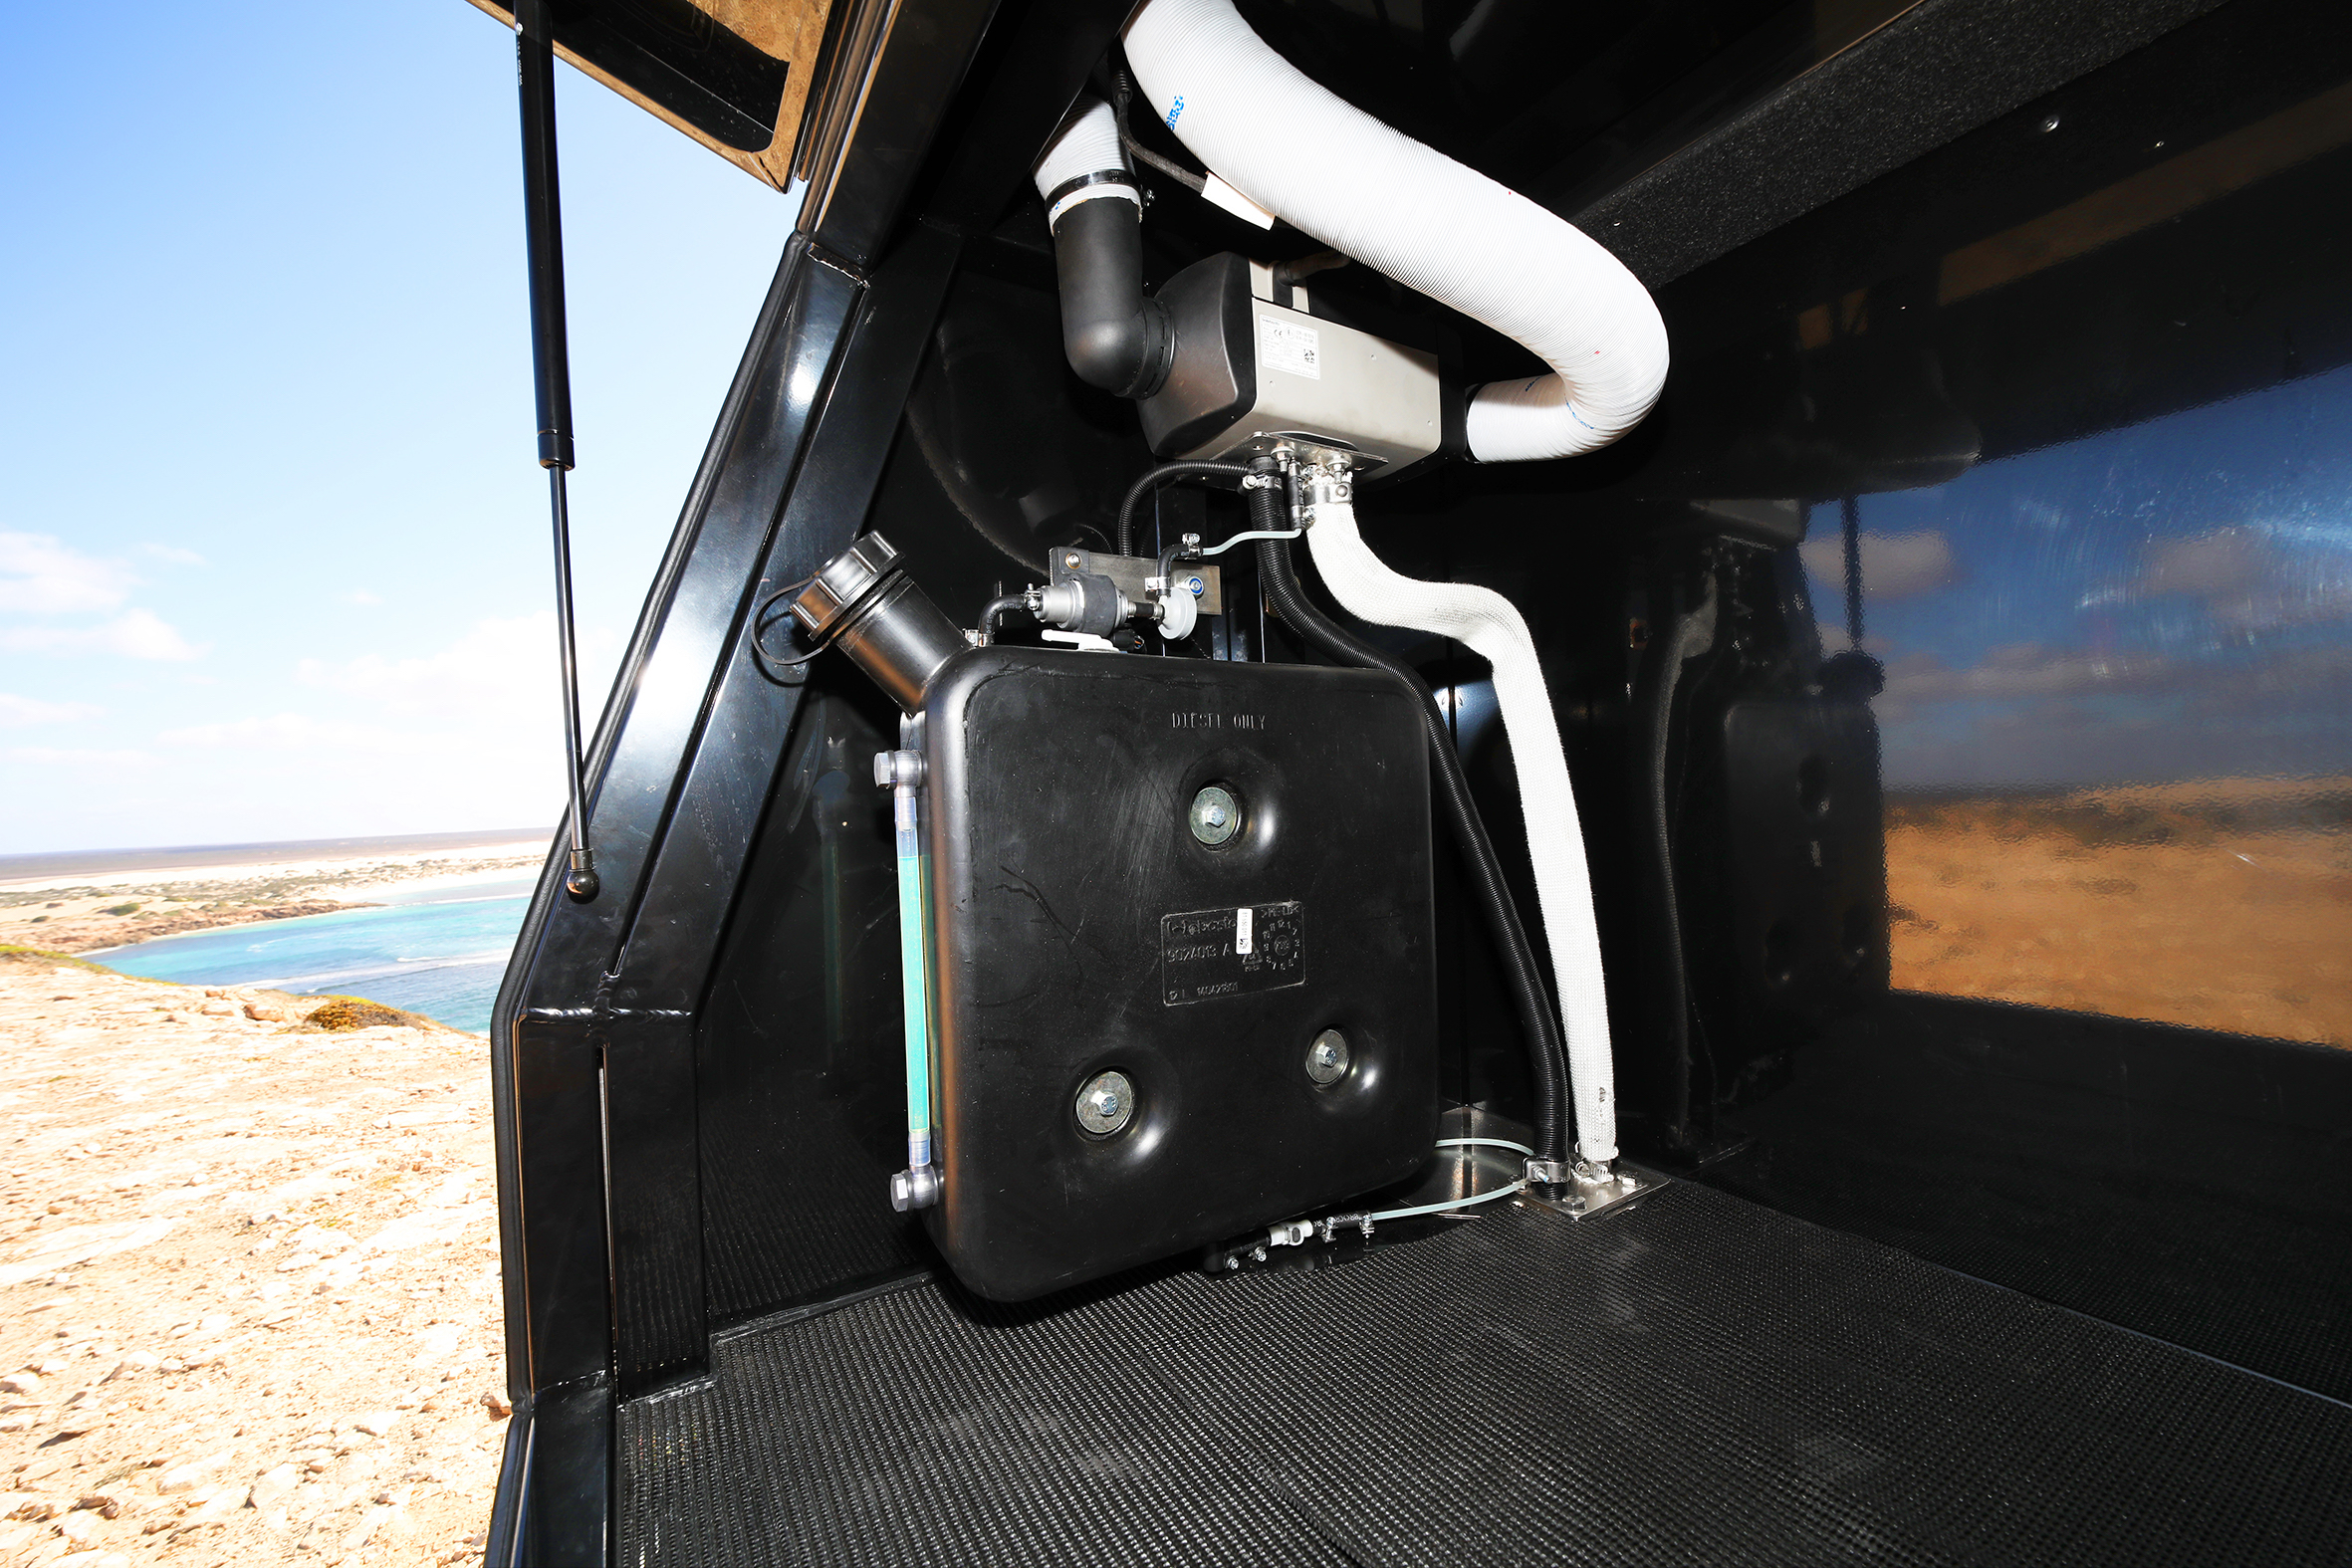
The body of the Webasto is mounted at the rear of the canopy, and it draws fuel from a 12-litre diesel tank. You can plumb them into your diesel tank, but I wanted mine to run independently. The heater uses a miniscule amount of diesel and is whisper quiet. In fact, all you can hear from the bed is the whisper of the fans. It does use 12-volt power as well, but my batteries dropped by a meagre one percent overnight. At around $1800 plus installation, the Webasto isn’t cheap, but there’s an element of trust in using a diesel motor that is running overnight, so I opted not to use a cheap import.
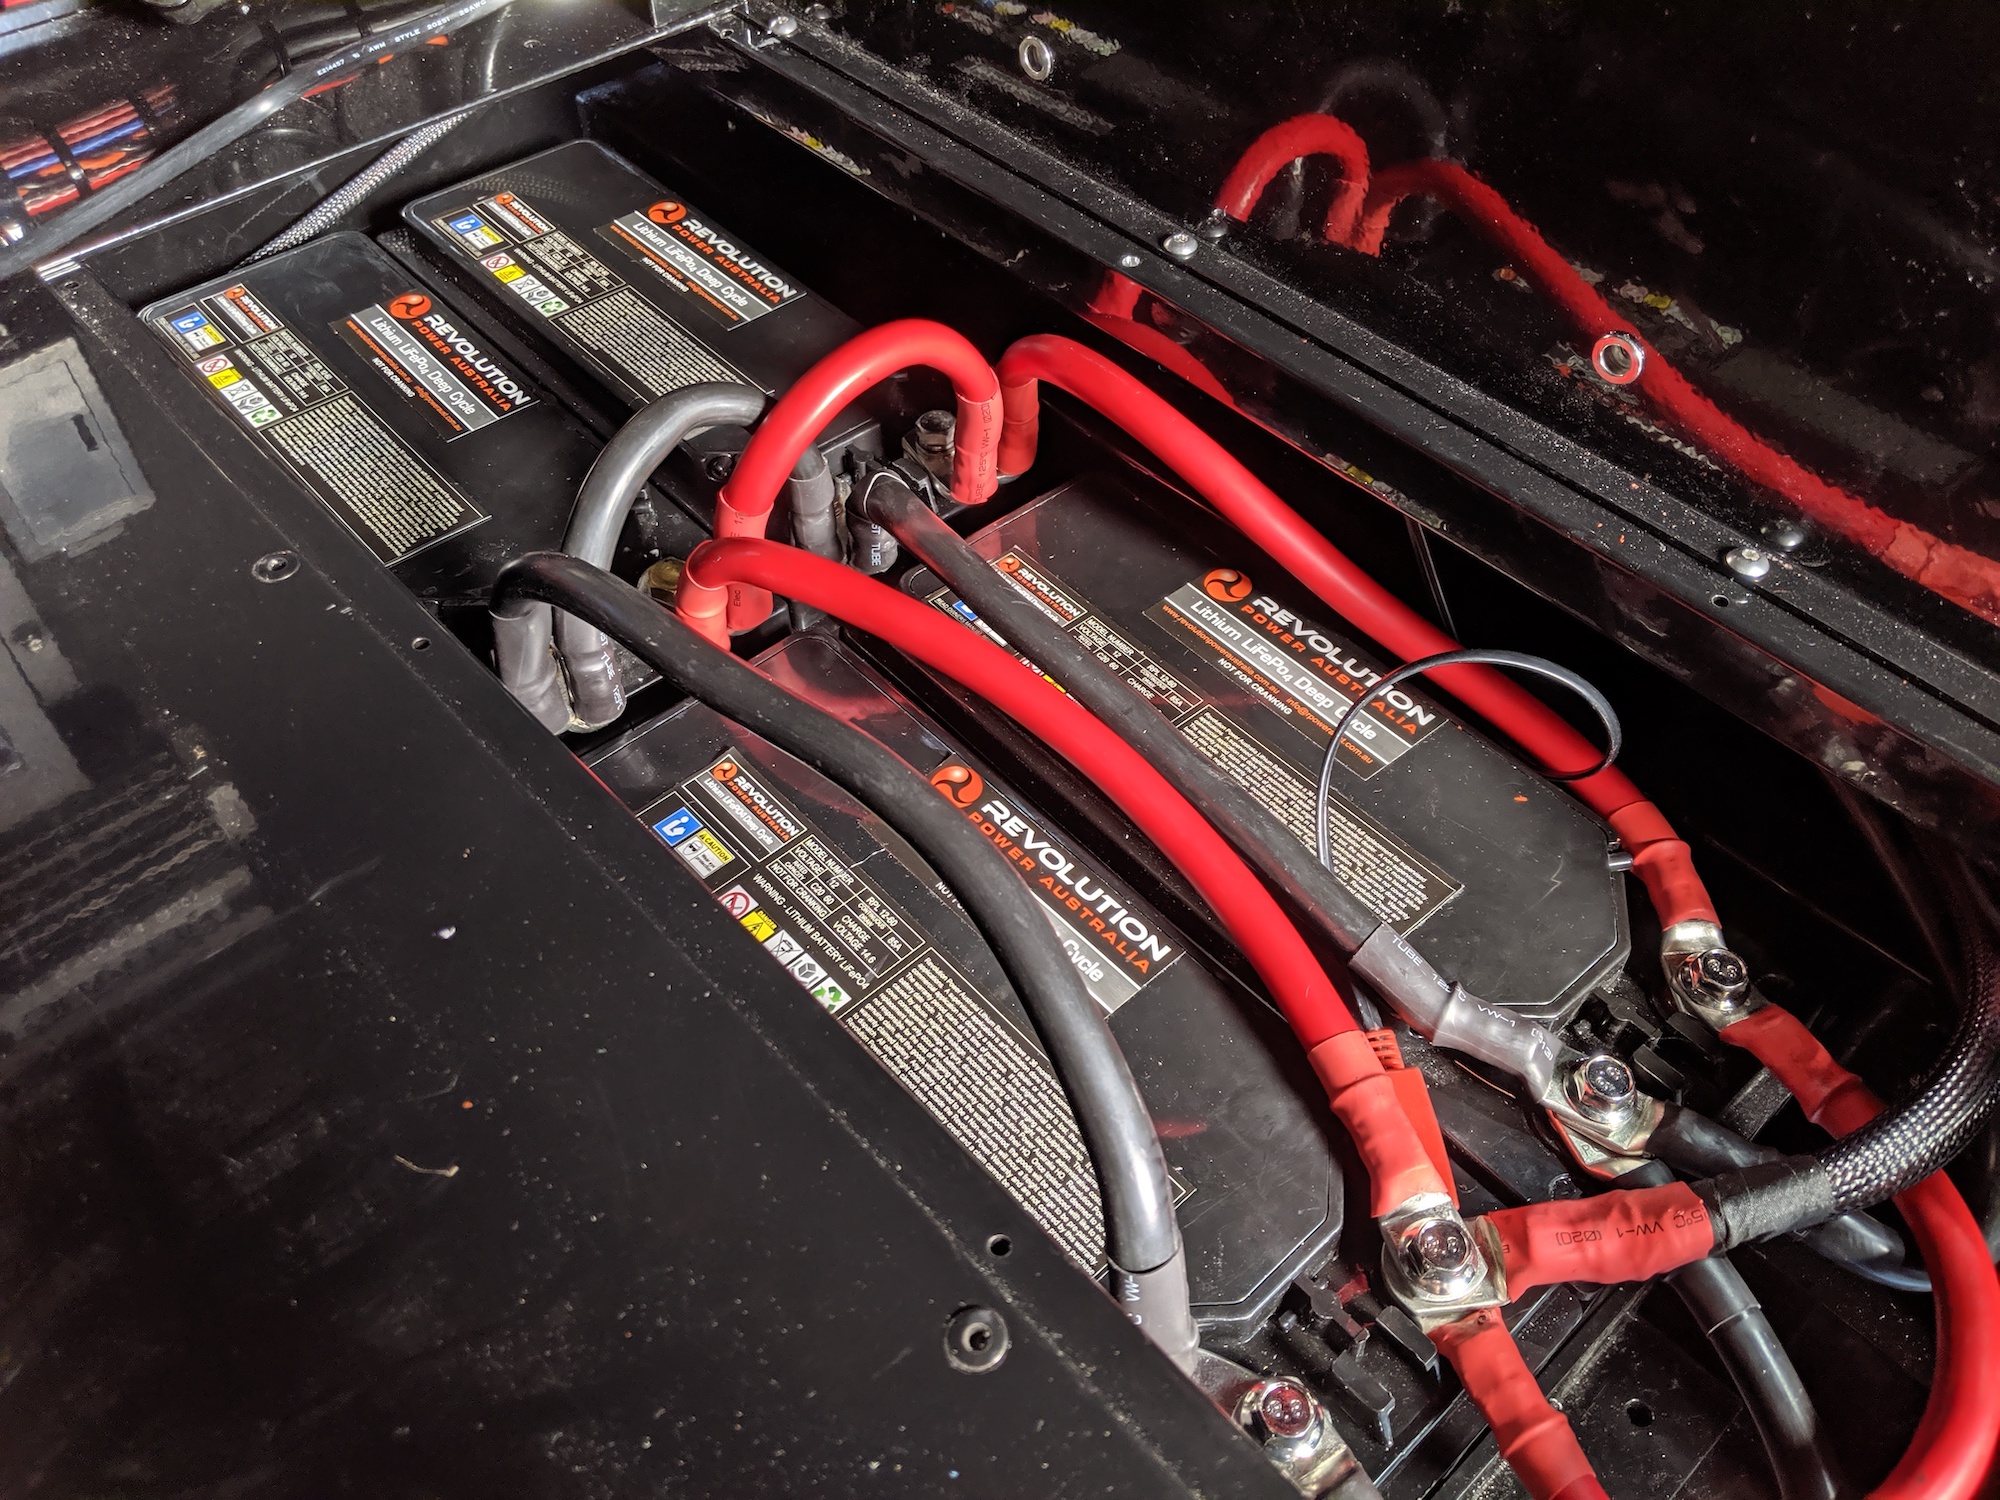
The canopy is split in two up the centre with a dividing wall, and on the driver’s side is the heart of the canopy’s electrical system. Four Revolution Power Australia lithium batteries were chosen, and they’re the 60AH slimline versions. Weighing in at just 7.7kgs each, these batteries are designed for rapid discharge and recharge. They’re not cheap, but they’re good for around a decade of normal use. And they don’t lie like many lithium batteries. What you read on the label, is what it delivers. There are loads of dishonestly labelled batteries out there, but Revolution isn’t one of them.
The batteries are bolted into a box up the front of the canopy, and this is where the fun really starts. The electrical system is run through the RedVision system. This began as a way of powering caravans, but has since been adopted by many high-end 4X4 builds. Why? Because it’s awesome. For a start, if you blow a fuse, rather than hunting through 20 fuses to see what has blown, a neat little LED lights up above a label, telling you where your problem lies. Superb. The RedVision is also connected via Bluetooth to an App on my phone, so I can switch lights on and off, and monitor power consumption remotely.
The RedVision is hooked up to a Manager 30, which handles charging as well. It decides whether to charge via 240v, solar, alternator or both. The Manager 30 is a 30A charger, so I’m also mounting a Redarc BCDC1240D, to get my charge up around the 65A mark, for even faster charging.
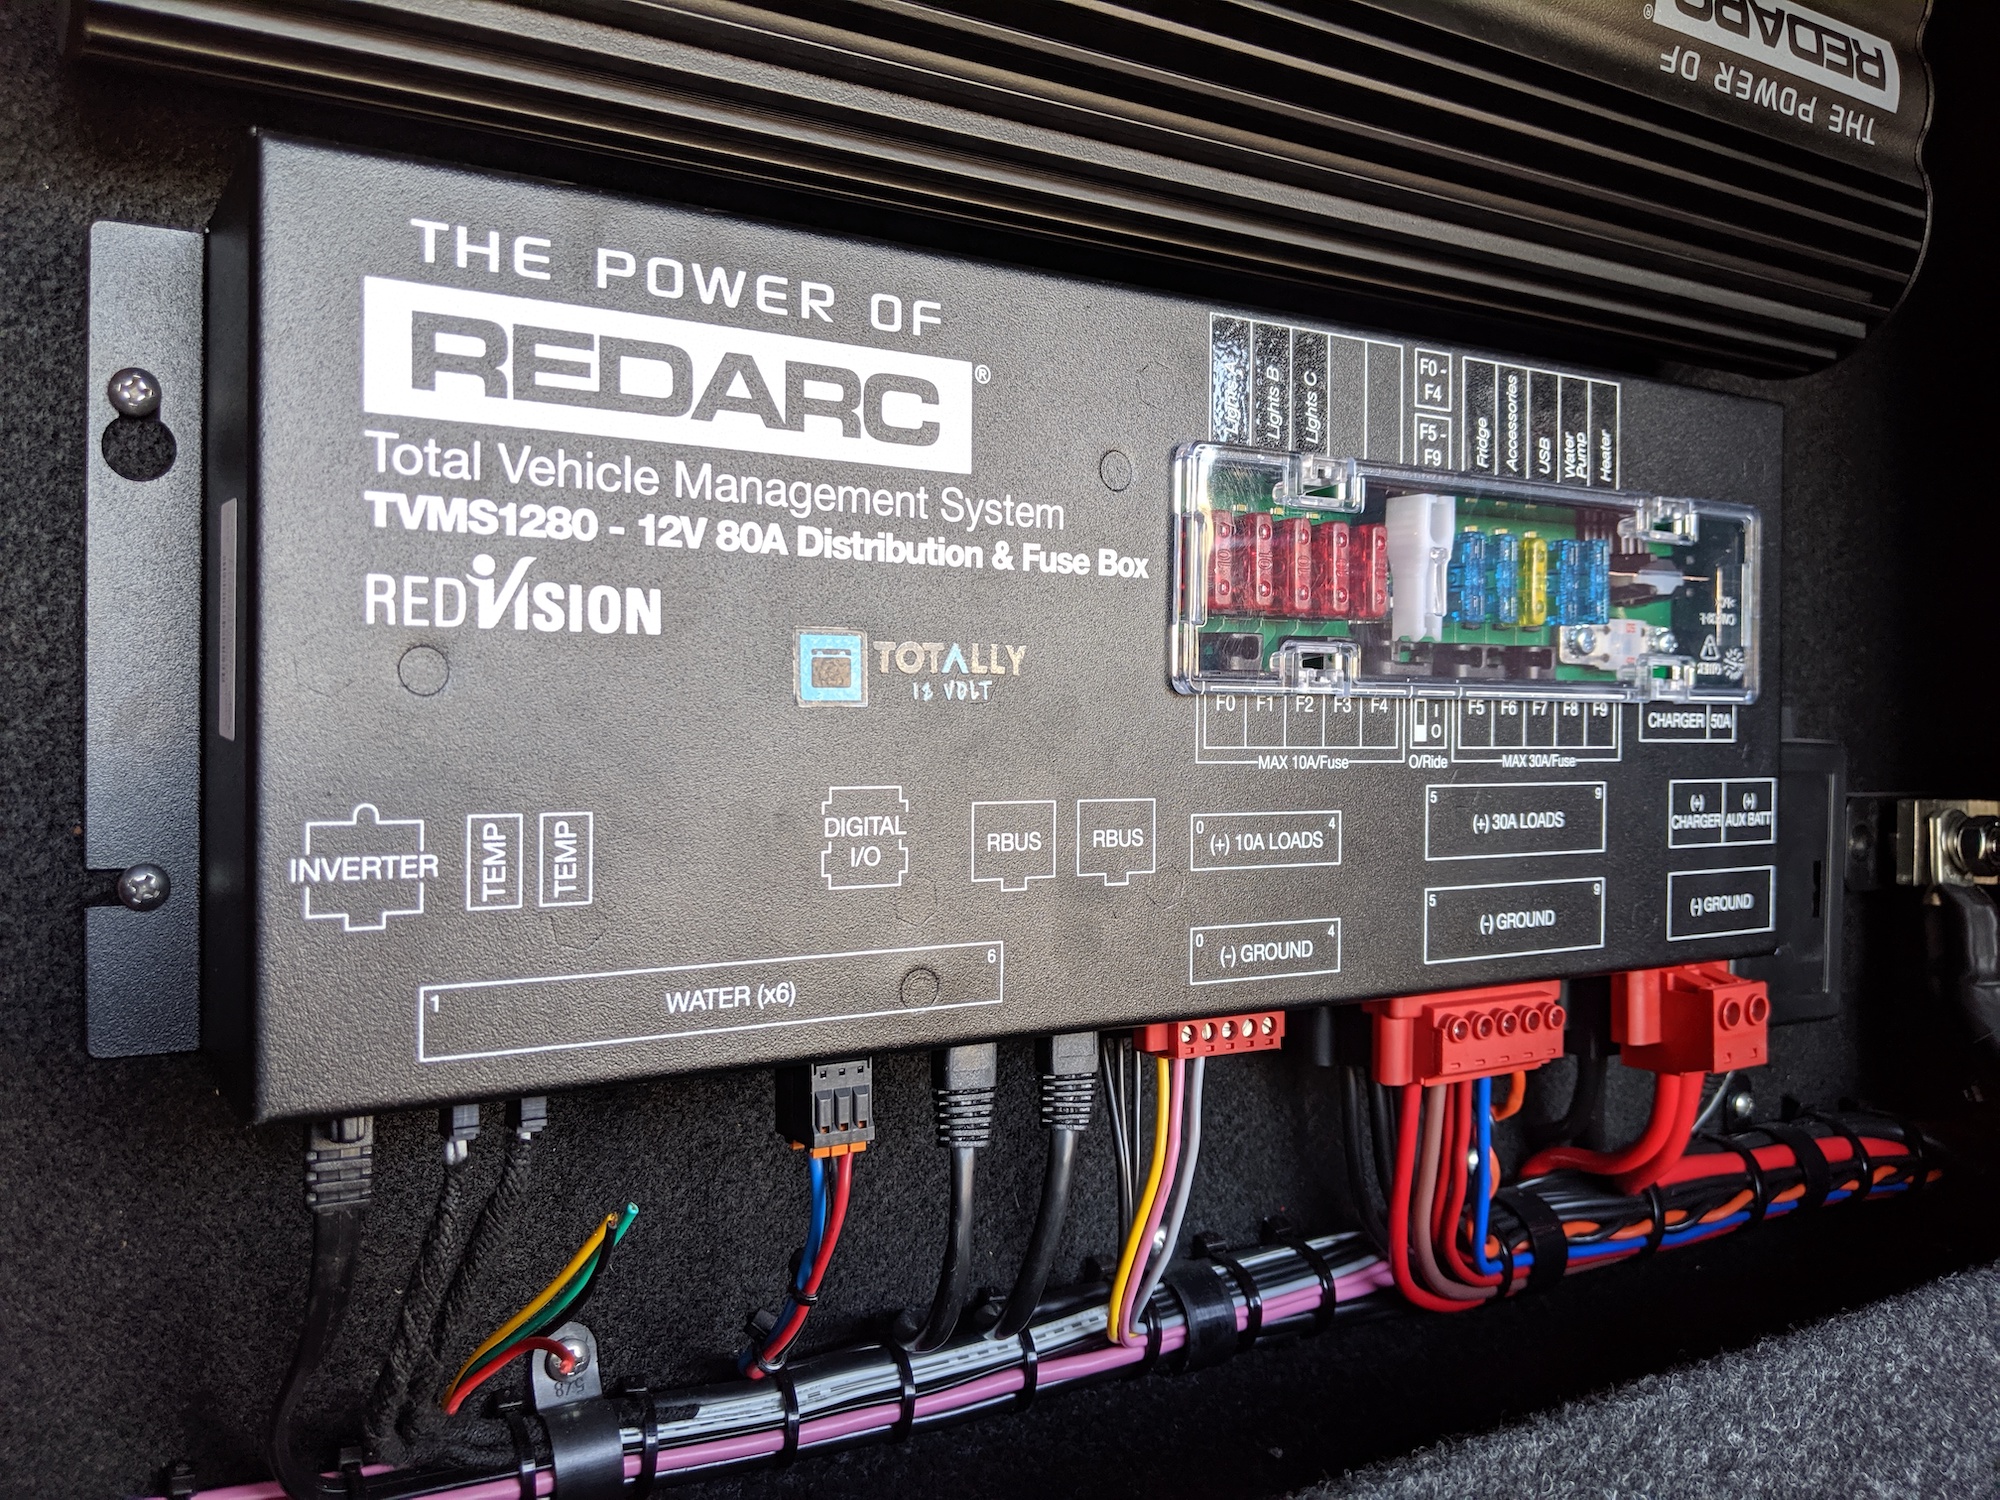
The system has been mounted beautifully in its own backlit recess by Totally 12-Volt in Brisbane. Shane Adams is an expert craftsman, and his workmanship is second to none.
Those grunty batteries also drive one serious inverter. Redarc’s 3000W unit sits proudly on the front wall and was wired up by my local 240-volt sparky, Dean McIlrea. Dean and his team not only fitted multiple power points throughout and a circuit breaker, he also had some coiled power leads made up for the coffee machine and the ceramic cooktop. Yes, you read that right. I figured with all of that power at my fingertips, I might as well use it. So, I settled on a two-burner Devanti unit, for less than $200 off eBay.
I was actually shopping for an induction cooktop which is even quicker, but mistakenly bought the ceramic one instead. It uses slightly less power (but still 2900W when both burners are turned up high), but I love the fact that I need no gas in this vehicle, and hence carry none. Not to mention I hate cleaning around gas burners after the Spag Bol has boiled over. The flat ceramic cooktop wipes clean in one hit.
Yet this mass of power has changed my idea of camp cooking entirely. I now carry a $29 sandwich press from Kmart. We all know the pain of stale bread and wraps on day five of a desert trip, and the sandwich press really sorts this out. Melted cheese toastie anyone? And I’m also going to experiment with my pressure cooker in the bush too. It can cook rice in nine minutes and seems like a sterling idea.
But the real gem is that coffee machine. Picked it up from Seconds World for $500, and she grinds the beans and does the full barista treatment. And as it’s only running for a short time, doesn’t drain the batteries too much. It’s bolted down on all corners, but I inserted some Velcro to stop the drip tray from sliding off over bumps.
The coffee machine is mounted on its own slide, complete with a drawer underneath for the accessories. Yet behind the machine sits a few special things. Firstly, there’s an Arke machine, which carbonates your drinks. Think Norwegian Sodastream. I had to get it cos it was black to match the truck, and I had room.
THE BEER SYSTEM
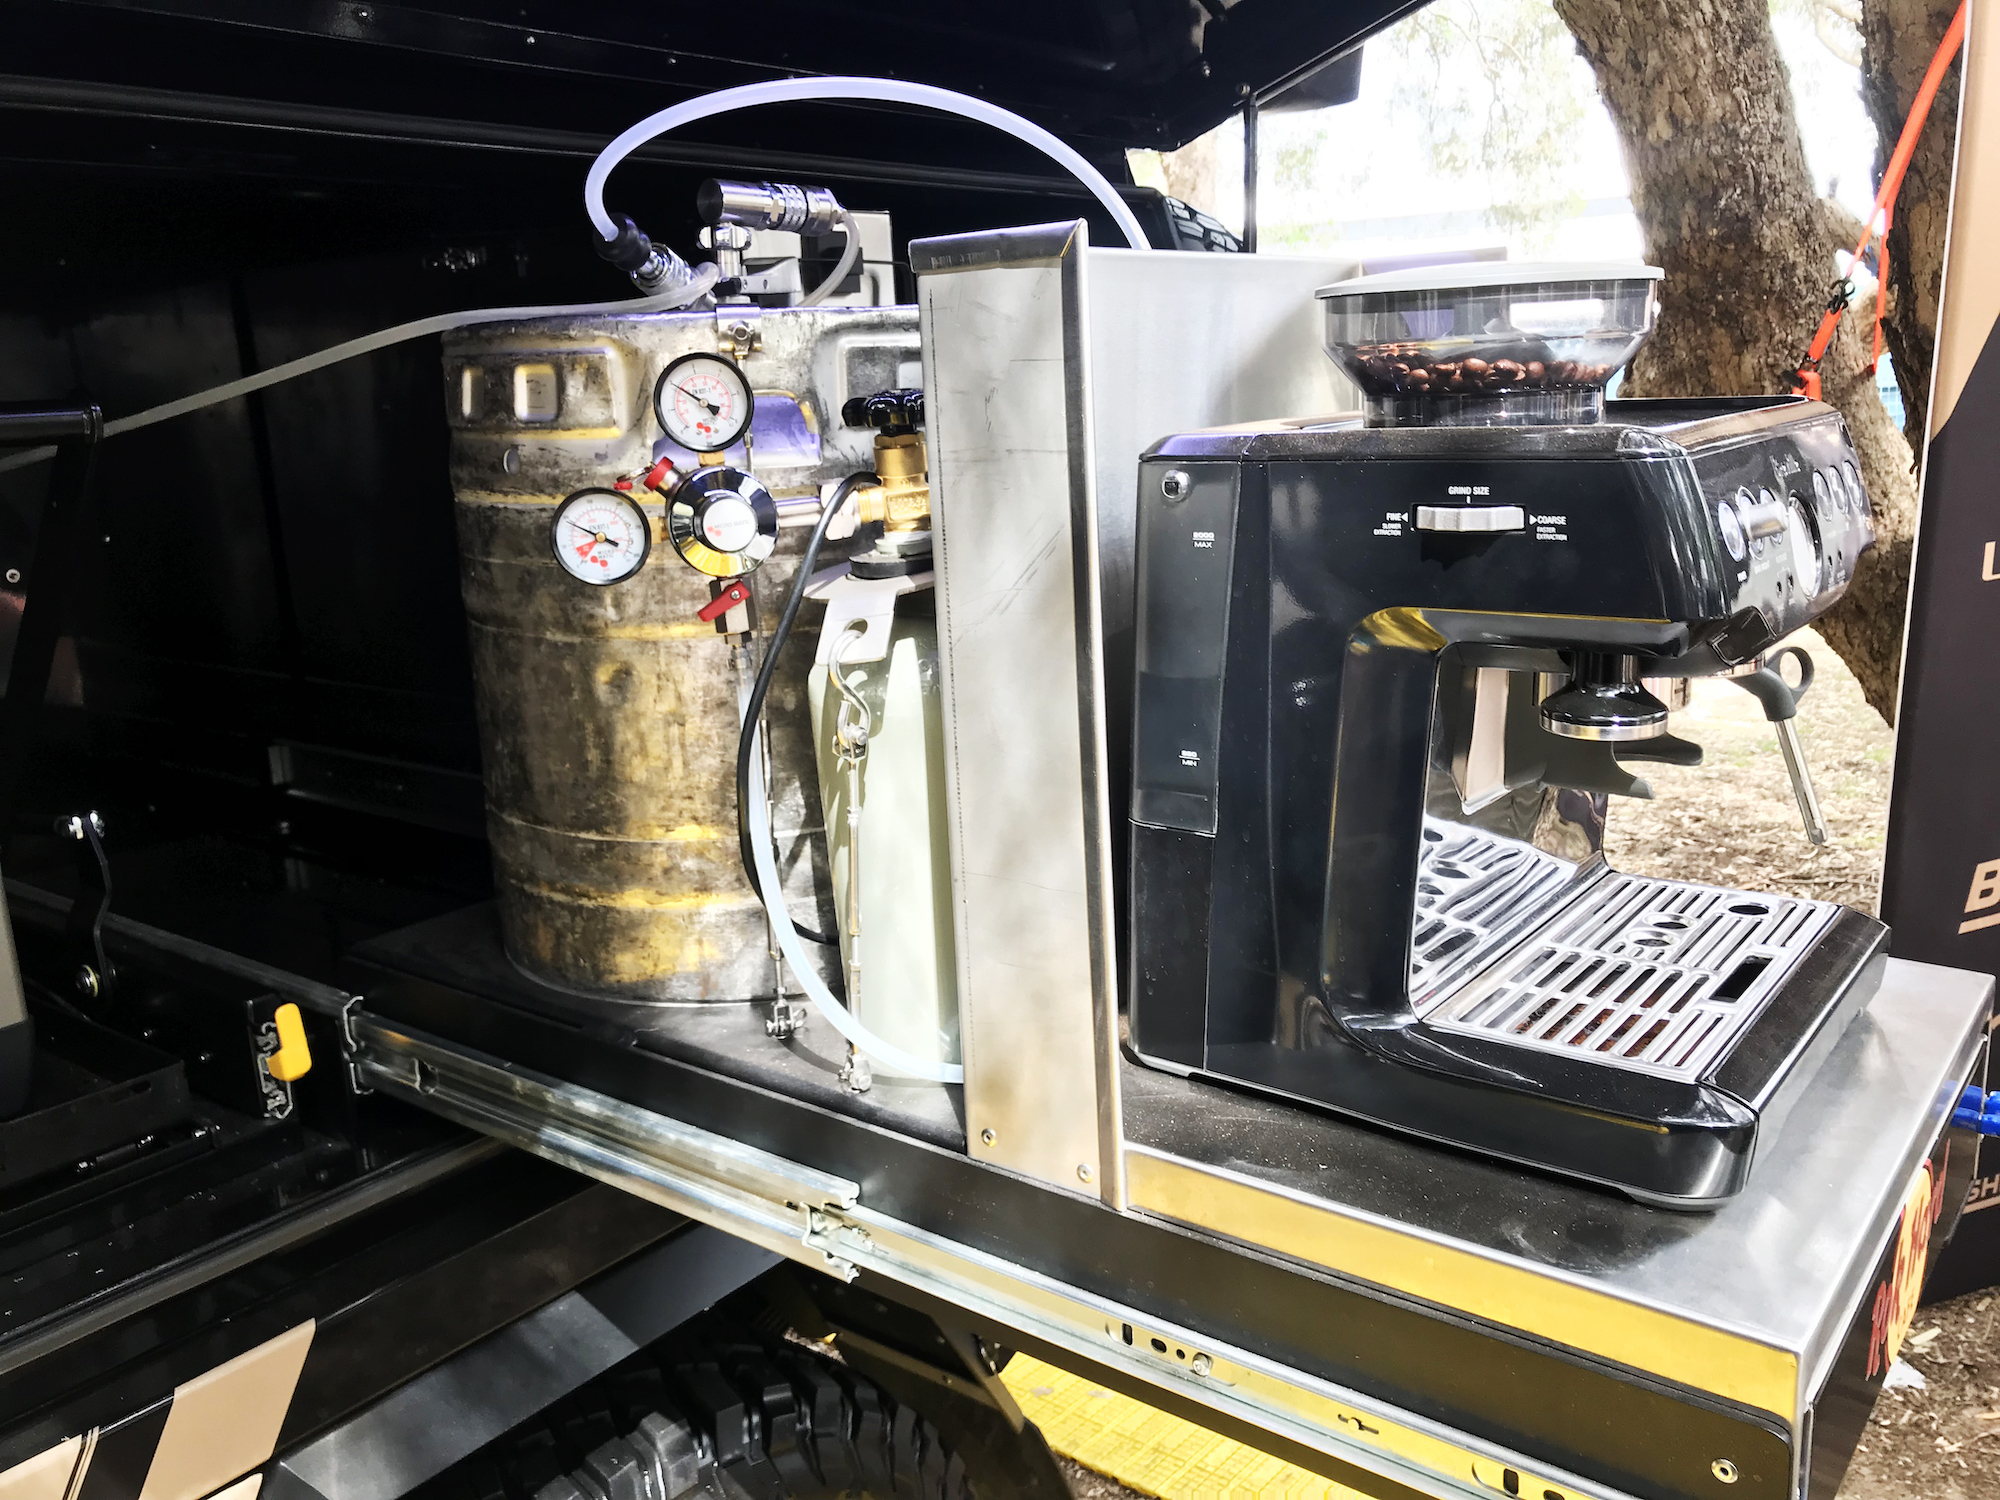
Yet behind that coffee machine sits a 50-litre commercial beer keg and 2.6kg CO2 bottle. I know, I know, I’ve got a problem. But it’s a fine problem to have my friends.
The beer starts its journey in the keg (warm) and is then piped through the fridge. I’ve used six metres of beer line, an Andale chiller plate, a chiller coil and then out she comes through a tap at the front of the fridge. This means I can pull at least four schooners and they’ll all be ice cold. Wait around 20 minutes, and you can pull four more. If I need to pull beers continually, I’ll just fill it with an icy slush, and should be able to run it permanently. I have previously used mini-kegs in the fridge, and they’re great, but you do lose capacity for food. With this system, the beer can stay warm in the keg (as it’s commercial beer), and the chiller elements take up very little room in the fridge. So there’s plenty of room for food.
The keg is recessed on the slide in its own Camp King cradle and is tied down using wire cables (he says as a single tear of joy rolls slowly down his cheek). And what started as a funny gimmick has turned into quite a practical mod. Firstly, it holds a lot of beer. I’m talking 250 pots or almost six cases. Secondly, you have no rubbish. I just have a set of acrylic schooner glasses, which I keep chilled in the ARB Classic fridge. And finally, you can fill up at just about any pub. I’ve used a D-type coupler, which allows me to access all of the CUB (Carlton United Breweries) range. This is your Fat Yaks, your Carlton Dry, VB etc. A full keg of Carlton Dry is priced at around the $377 mark at my local, the Lapstone Hotel.
Of course, it could be downright dangerous to go into the bush with not enough beer, so Redarc has custom-made me a flowmeter, so I can tell on my phone through the RedVision App just how much beer I have in the keg at any time. Sometimes life is just too glorious for words, and that sometimes is now.
The 78-litre ARB fridge/freezer sits upon a Clearview Easy Slide, bringing the whole unit down nice and low. And there’s an additional clip-on table from Clearview that grabs you some handy additional bench space.
Next to the coffee machine, sits one of the real Camp King innovations. It’s a slender pantry, which slides out and then folds open to reveal a superb storage space. There’s a cutlery nook at the bottom, a slide-out drawer for breads and condiments, and a three-level cupboard with a fold-up side. Hard to explain, but easy to show in a video. Next to that is a storage area, and underneath is a pull-out bench, housing a sink area and the ceramic cooktop.
Underneath the tray, there’s a 75-litre water tank with a sensor that’s hooked up to RedVision for monitoring. So with my RedVision App, I can check my water levels.
The Camp King canopy, complete with powder coating, tent, and all manner of weird and wonderful beer slides and pantries, is priced at around $45K. Not bad for having the coolest canopy on the block.
AWNING
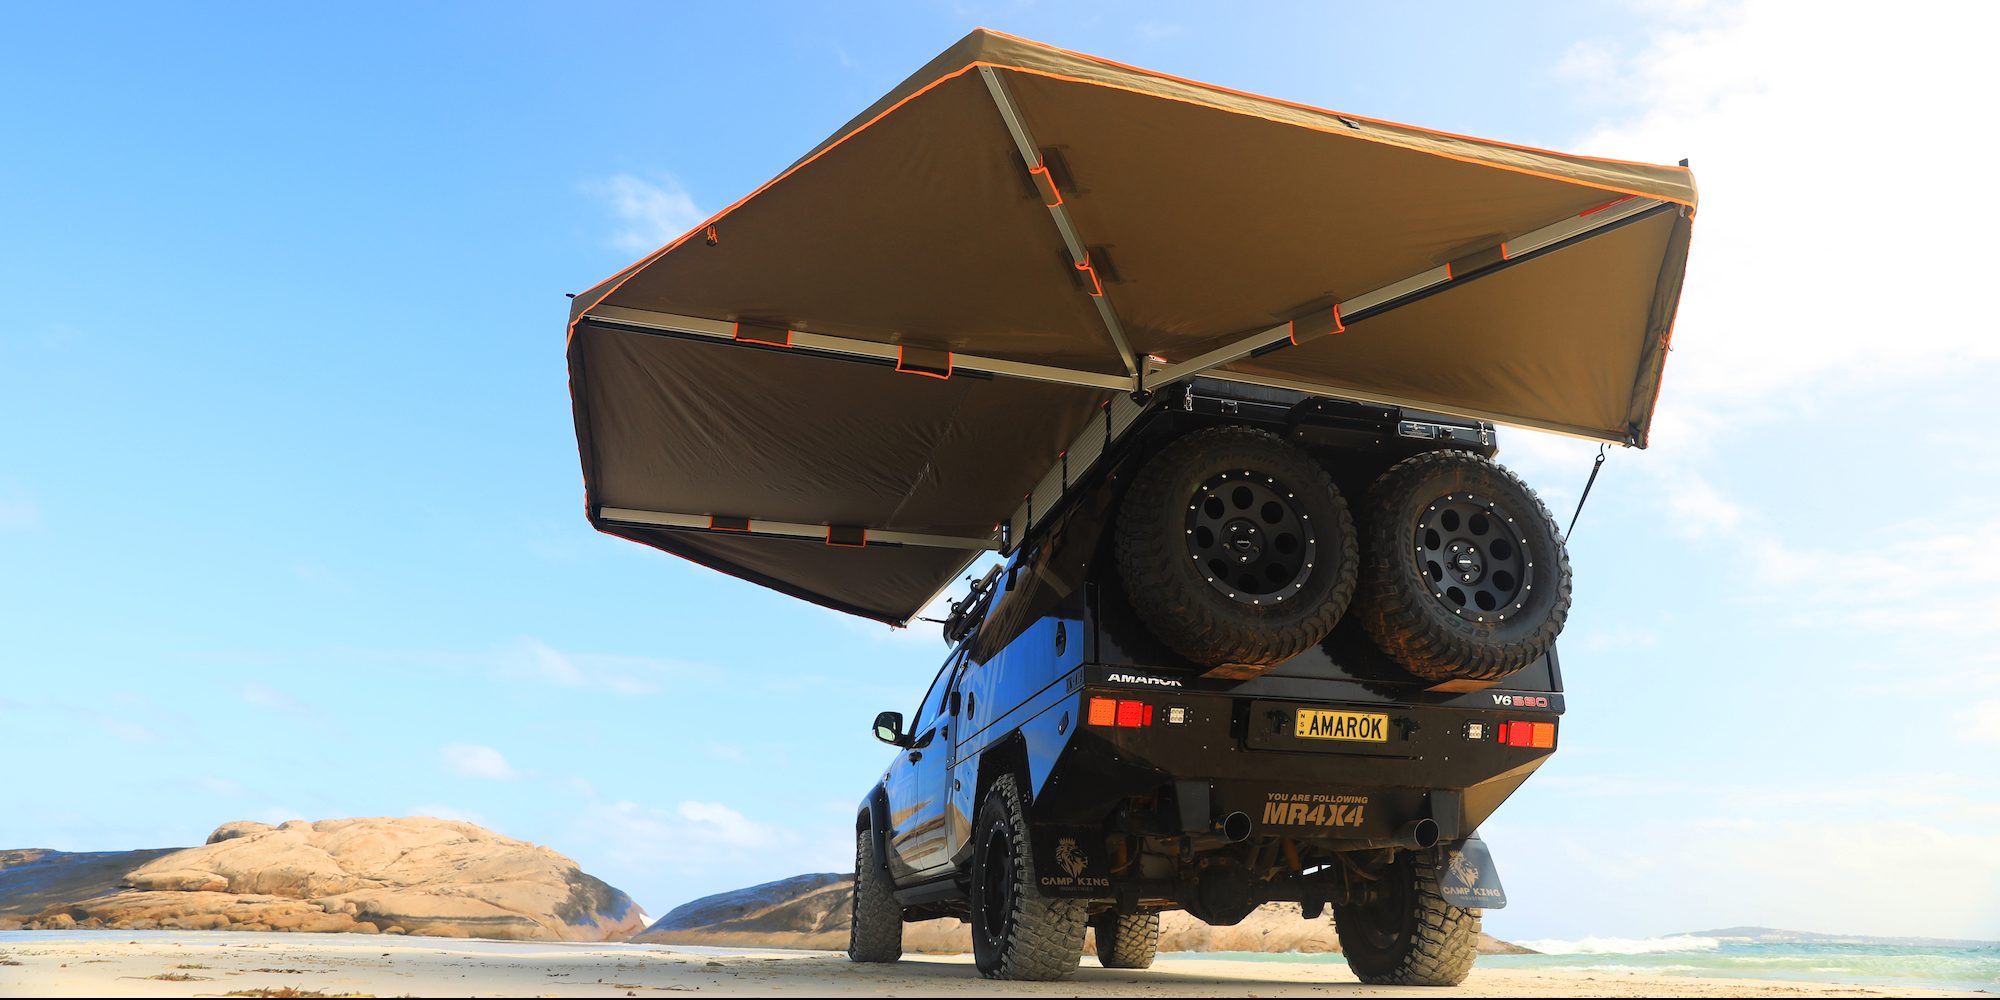
I chose the Darche Eclipse 270 awning, and I promise it wasn’t just because the bag was black and matched the canopy. That was a mere bonus. The Camp King team mounted it off the passenger side, and it doesn’t obstruct the opening of the canopy. However, it does create masses of shade. Covering an entire side, corner and the rear of the canopy, it really is a brilliant design well executed. Setup is fast, but will take a touch longer if there is wind in the air, as it needs to be pegged down. The arms are strong welded alloy units, so could handle a buffeting. Pack down is usually the worst part of any awning, but once you get the knack of the roll-up canvas, it’s quite easy with the Darche Eclipse 270.
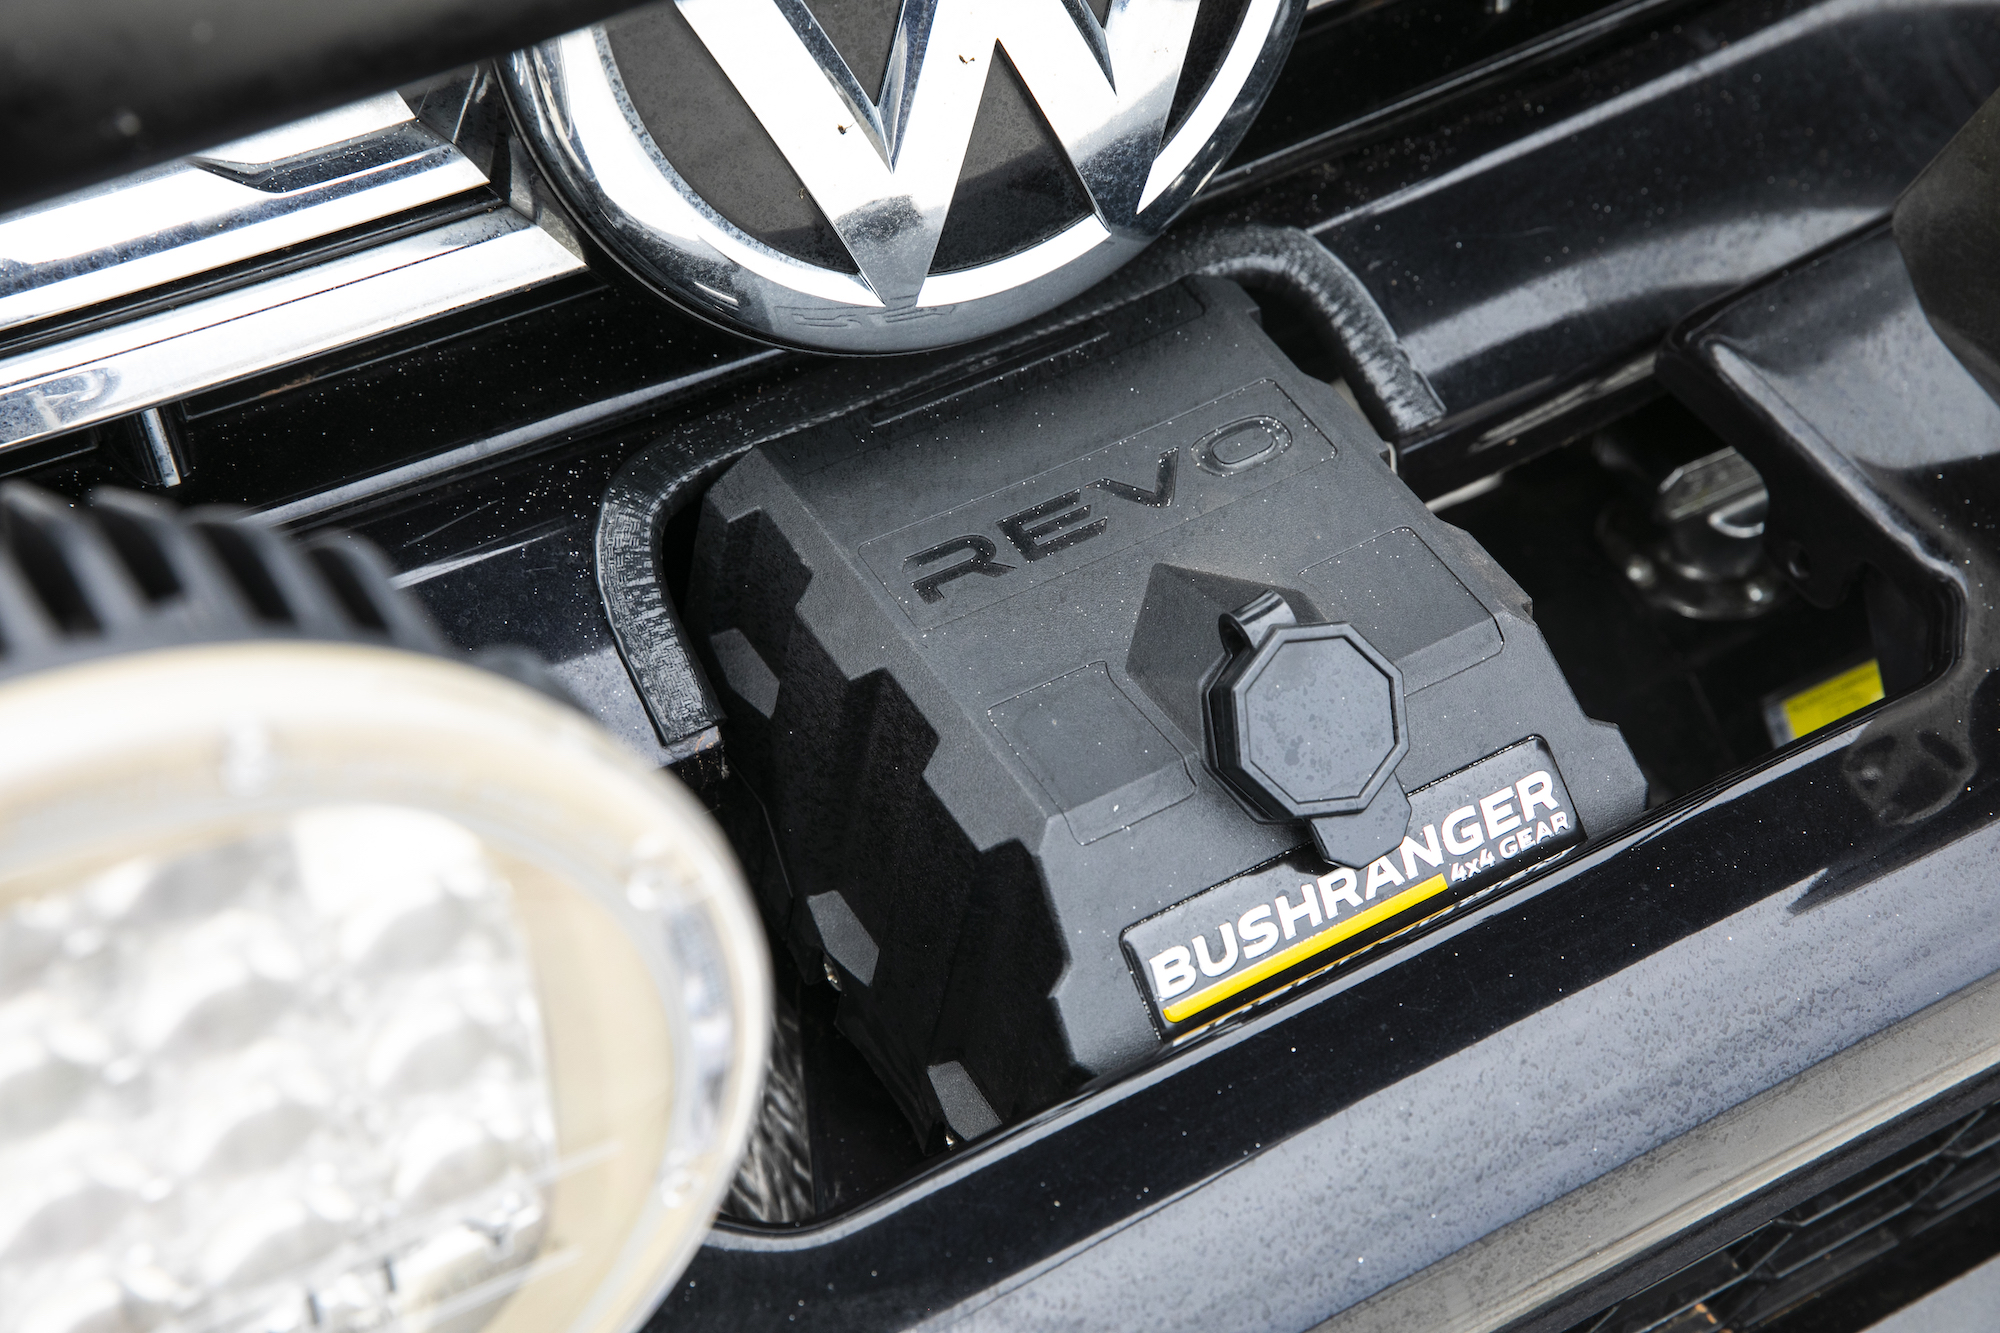
COMPRESSORS & WINCH
The final icing on the Amarok cake was done by ARB Moorebank and ARB Narellan in their magnificent new store. The Moorebank team hooked up an ARB twin compressor into the passenger-side rear storage box, and also plumbed it into their LINX system. The automatic pressure control setup with this combination is superb and only improved when matched with the Clearview Tyre Spider. I can hook up all four tyres, and inflate or deflate simultaneously. And when you’re inflating 35-inch tyres from 15psi on the beach up to 50psi for the road, it’s a glorious combination. Hook it all up, and walk away ‘til you hear the compressor stop.
ARB Moorebank also wired in the Bushranger REVO 10,000lb winch. Having used this winch on my son’s Defender before, I knew just how strong it was. And with synthetic rope as standard, the weight is pretty forgiving too. But I particularly like the proportional braking system, which can hold 100% of the rated load, with zero slippage. And as you’d expect of a Bushranger winch, the motor and gearbox is fully water sealed (IP67 rating). The remote control is wireless too and works a treat. Surprisingly, the winch, even with its seven-year electrical warranty, is priced at just $1045.
ENGINE & FILTRATION
Being a remote touring machine, I was determined that all core mods would be proven and reliable. And while I’ve had some success in recent times with flash tuning, I opted for a system I’ve been using for the past eight years. The Steinbauer Performance module gives me 20% more power and torque, turning the Amarok into a 240kW and 700NM powerhouse. German module on a German 4X4 – sorta makes sense they would work well together.
And the Steinbauer from Diesel Care has some nice safety features built-in, like the fact that it will revert to standard power after being at full throttle for extended periods. Plus, it can be unplugged at any stage, and your vehicle will revert to normal; particularly handy if you’re troubleshooting in the bush. It also doesn’t tinker with the fuel rail pressure, which is what many of the cheaper units tend to do.
Now, even with the big canopy on the back, the Amarok drives brilliantly. In fact, I’d be pretty certain that it would beat my Amarok 550 in a drag race, despite having a significant weight disadvantage. The power and torque is simply awesome.
While up in Queensland, I dropped in to see Jeremy at Direction Plus where he fitted one of his Preline diesel filters. These are a smart system indeed, slotting between the fuel tank and the factory filter. Water contamination is unfortunately quite common, and not just in the bush, and a system like this pretty much guarantees that damaging water won’t get into your engine. With its multi-stage water alert, you can even have a cabin-mounted buzzer alert you that there’s water in the system.
Jeremy also mounted a Direction Plus oil separator, more commonly known as a catch can. I’ve been using one on my 550 Amarok for a while now and am really happy with the results. I tend to find plenty of water and oil in the unit, and it’s really easy to drain.
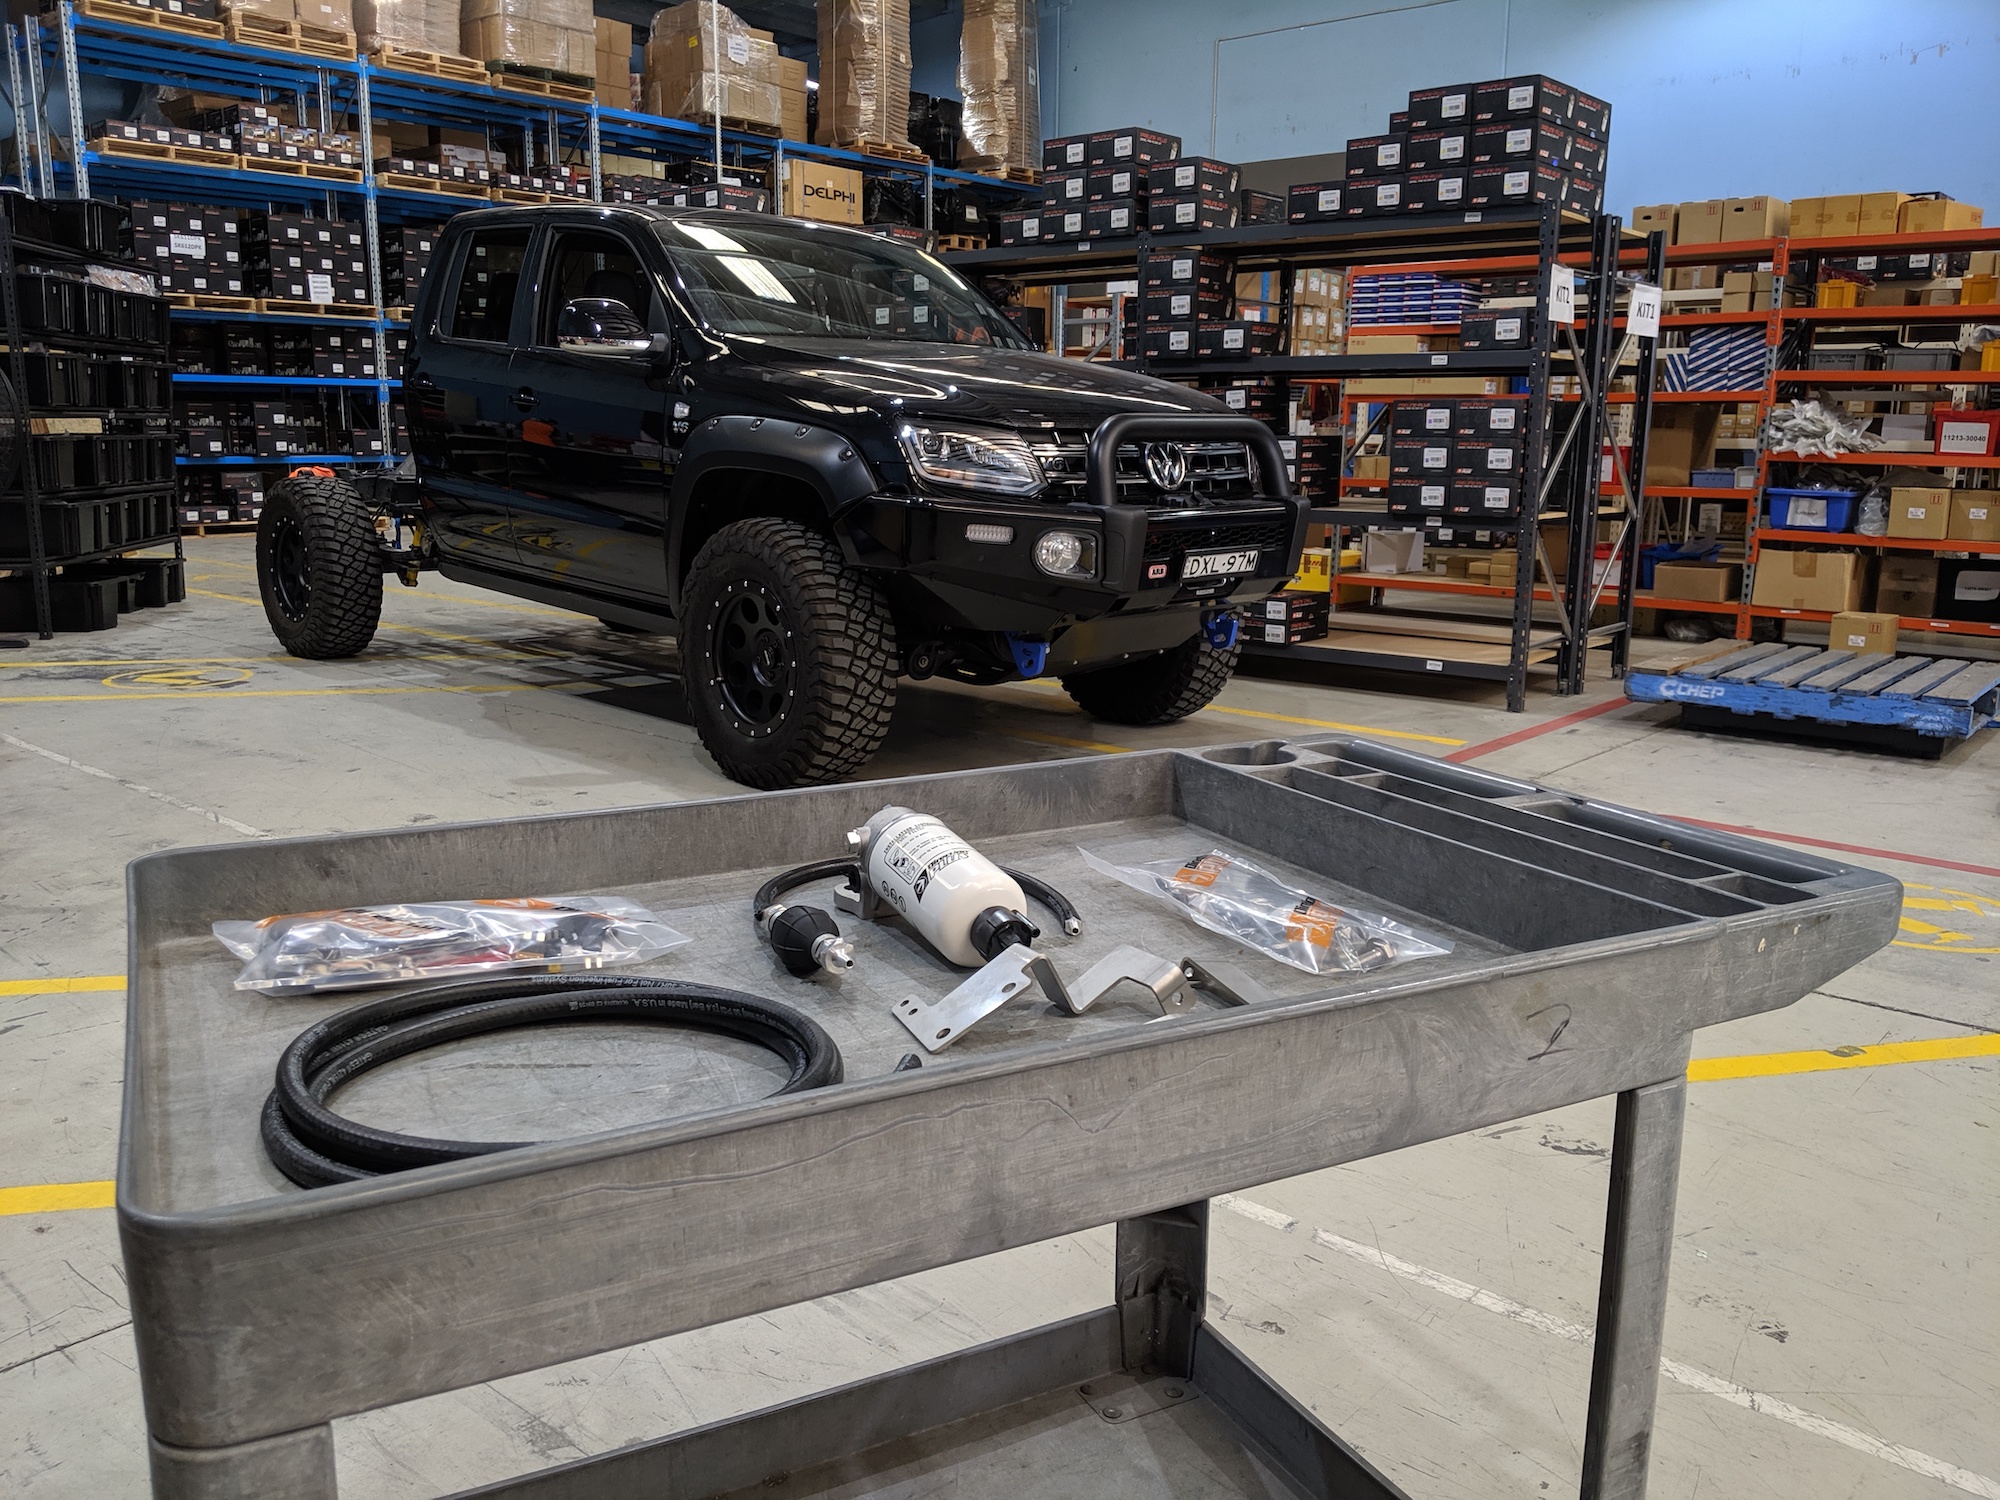
The Direction Plus unit utilizes a Mann+Hummel filter, which is the most effective oil separator I’ve seen, and the rest of the brackets and components are all high quality.
RUGGED BRAKES
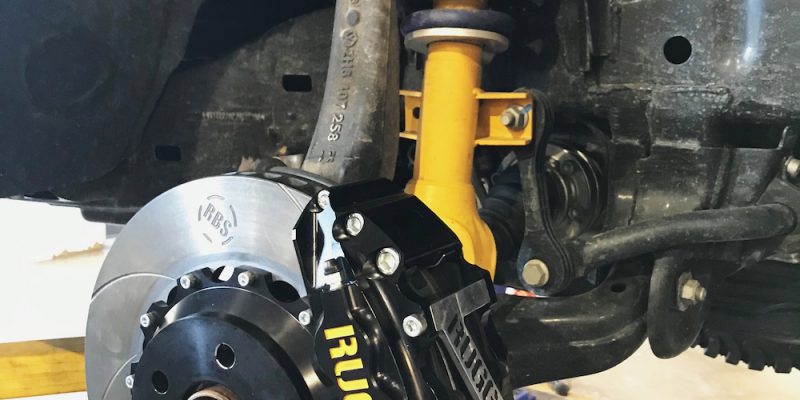
While in Brisbane, I was lucky enough to steer the Amarok into the R&D workshop of Rugged Brakes. With a heritage of motorsport behind them, the Rugged team understand that everything needs to be rebuildable on the side of the track should it fail – be it racetrack or dirt track. In fact, if you do need to change the pads, no removal of the calliper is necessary.
Rugged’s happiest customers are usually those who carry heavy loads around (either tradies or 4X4 tourers), and their brakes aren’t engineered for the additional loads. Think fully kitted 79s and Ivecos, and you’re getting warm. And while the Amarok actually has very decent brakes from factory complete with four-wheel discs, there’s always room for improvement. I went for the Rugged Extreme brake setup, which is significantly lighter than the OE design.
The callipers are made from aircraft-grade aluminium, and the stainless-steel pad abutments give really nice pedal feel.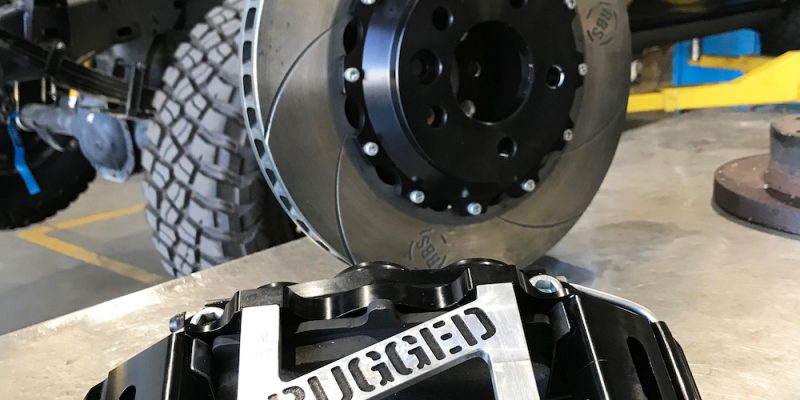
But hey, you buy these brakes not because they feel good, but because they stop you fast. With a hard-anodized six-piston design, that was never really in doubt. The Ultimate Amarok stops brilliantly, and with the added 3D slots, they self-clean well and stay nice and cool. It really is surprising just how well the Amarok pulls up, considering the weight it now carries; as it should, with that $4500 investment.
TRANSMISSION
The eight-speed Amarok auto is one of the best on the market. Smooth, adaptable and with plenty of ratios for every condition. However, the conservative VW engineers have given it an Achilles heel. They’ve wound down the torque to 200Nm in reverse, to protect it against damage. Now, this is fine in most situations, but if you’re getting out of a deep bog in reverse, or pushing a trailer backwards up a steep hill, you can run out of puff. So I scurried across the lane from our Blaxland office to Advanced Installation Service (CRD Tech Sydney), to regain my torque. There, Jeremy reprogrammed the transmission, altering the shift points to account for the additional Steinbauer power, and removing the torque limiter. This cost me around $750.
In future, I’d like to install a transmission cooler, but I’m yet to hear of their availability for Amarok. These are handy particularly in slow, rocky work where the transmission labours.
EXHAUST
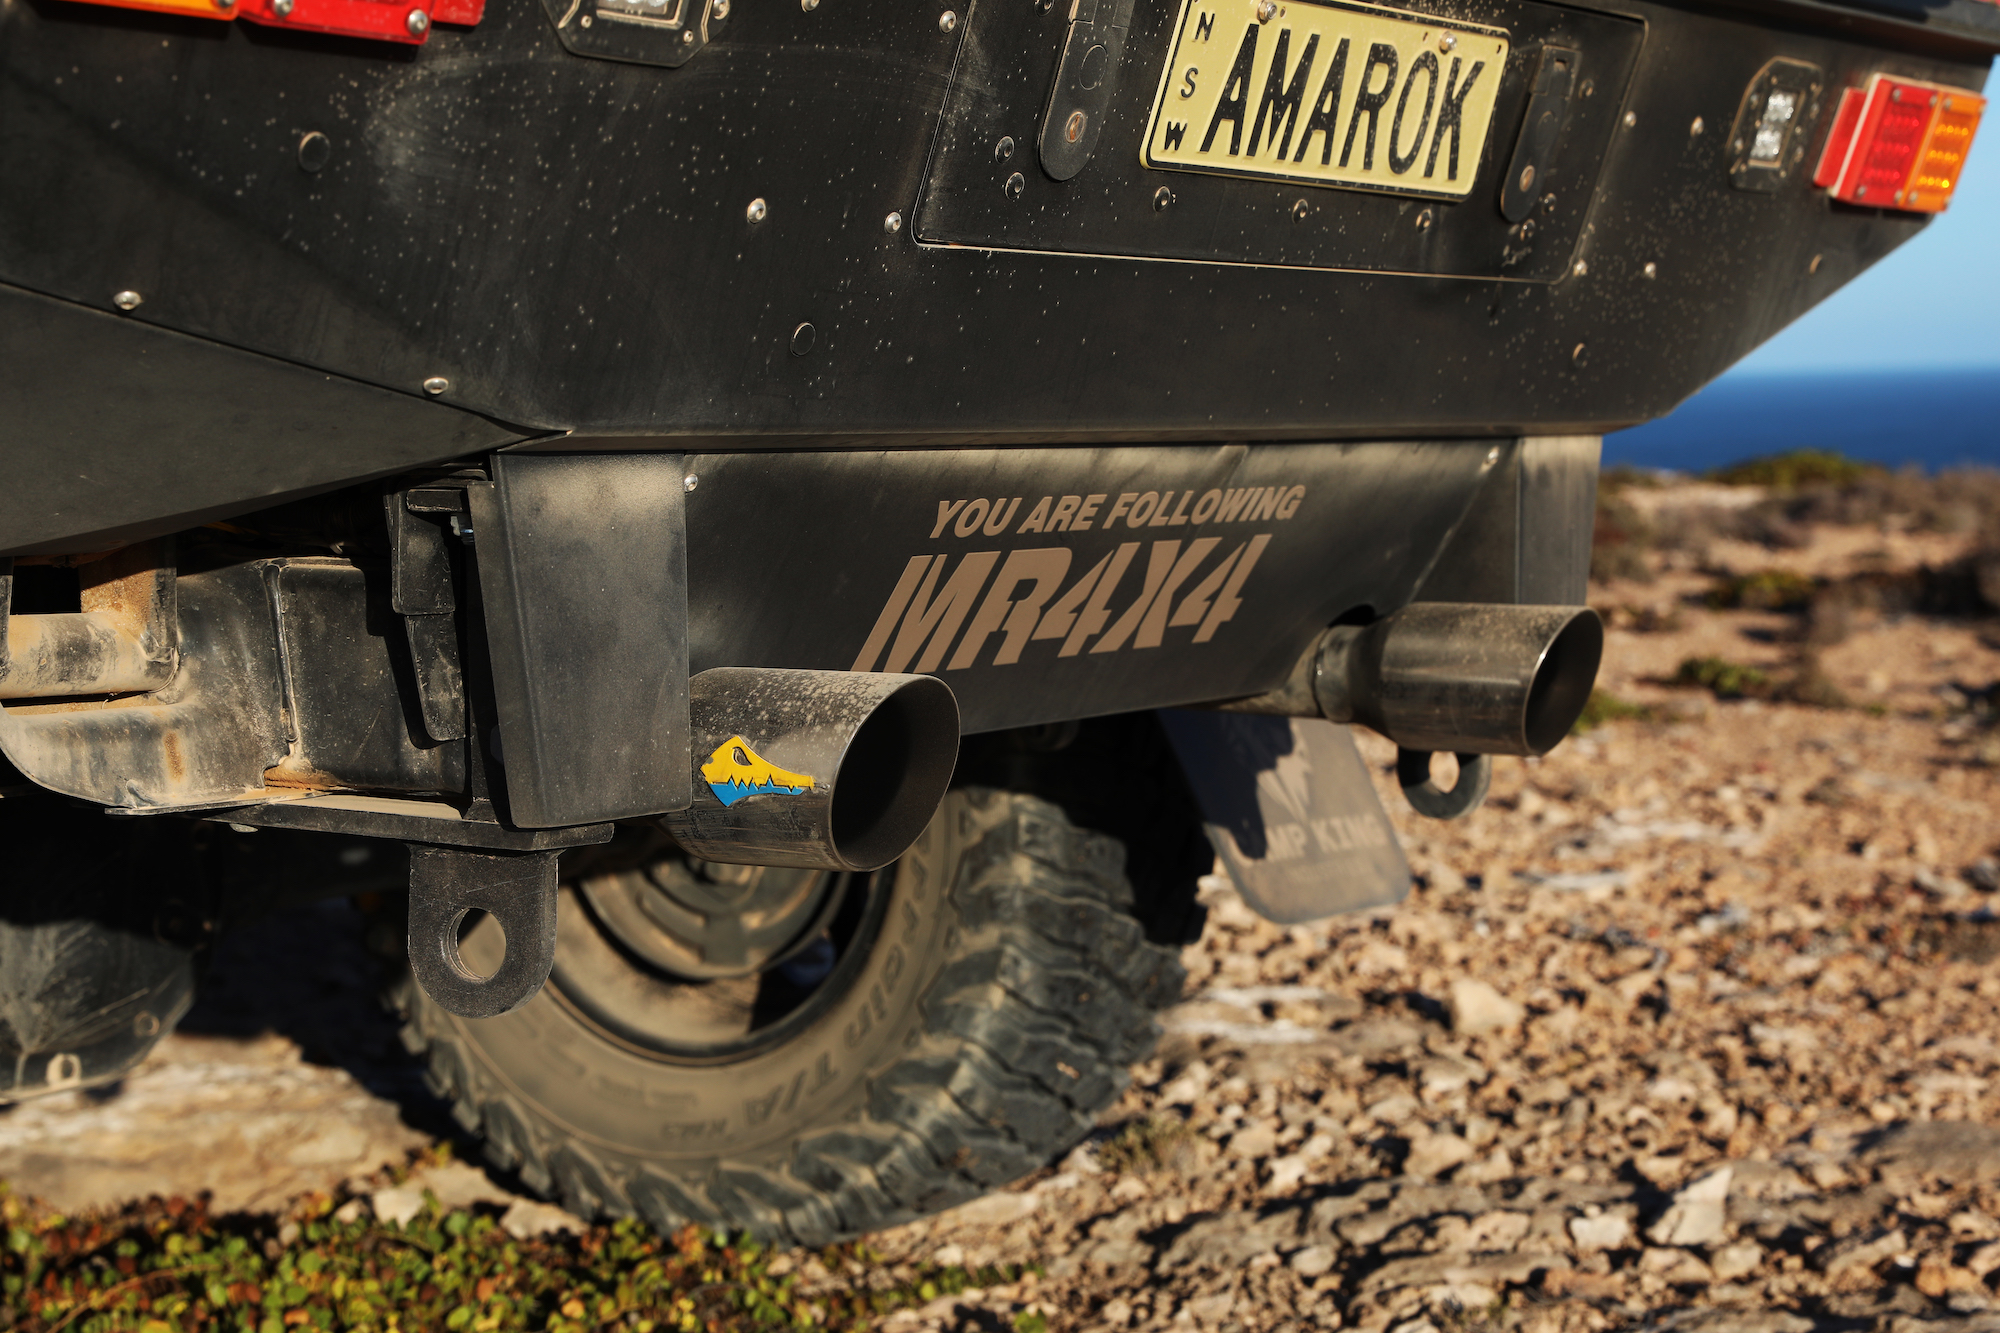
Every car that’s going to go on show needs to have some snazzy pipes, and the team at Beaudesert Exhaust sure know how to build those. With 30 years in the business, they’ve grown to carry more stock than any other in Australia. As soon as I arrived, Jamie whipped out the incredible 3D scanner and set about mapping the entire underbody of the Amarok. In 20 minutes, he had produced a drawing showing all major components and their location, so he could route the pipes mistake-free. That, along with eight-million dollars’ worth of mandrel bending machines that are micron accurate, means those three-inch pipes were always going to land in the right place. High-quality materials have been used throughout, including meaty rubber mounts. The actual pipes are made from 441 stainless steel, as opposed to the more common 409 stainless.
The advantage of this is that it will retain its polished look; where 409 will more discolour over time. That, and the fact that thanks to a high chromium content (similar to that of 304 Stainless) and a decent percentage of titanium, it is slightly softer so is less prone to stress fractures. Those polished stainless pipes have been finished off with some trademark Beaudesert crocs.
The engine note is now that little bit sweeter, and despite leaving the DPF in, there are still some power gains to be had. I haven’t had it dyno tested (because it won’t fit on the dyno now, too long and AWD), but an additional 4-5kW is the theoretical increase. It sure feels like more than that though, and particularly at overtaking speeds, the Amarok 580 loves to get up to a fast gallop.
FUEL TANK
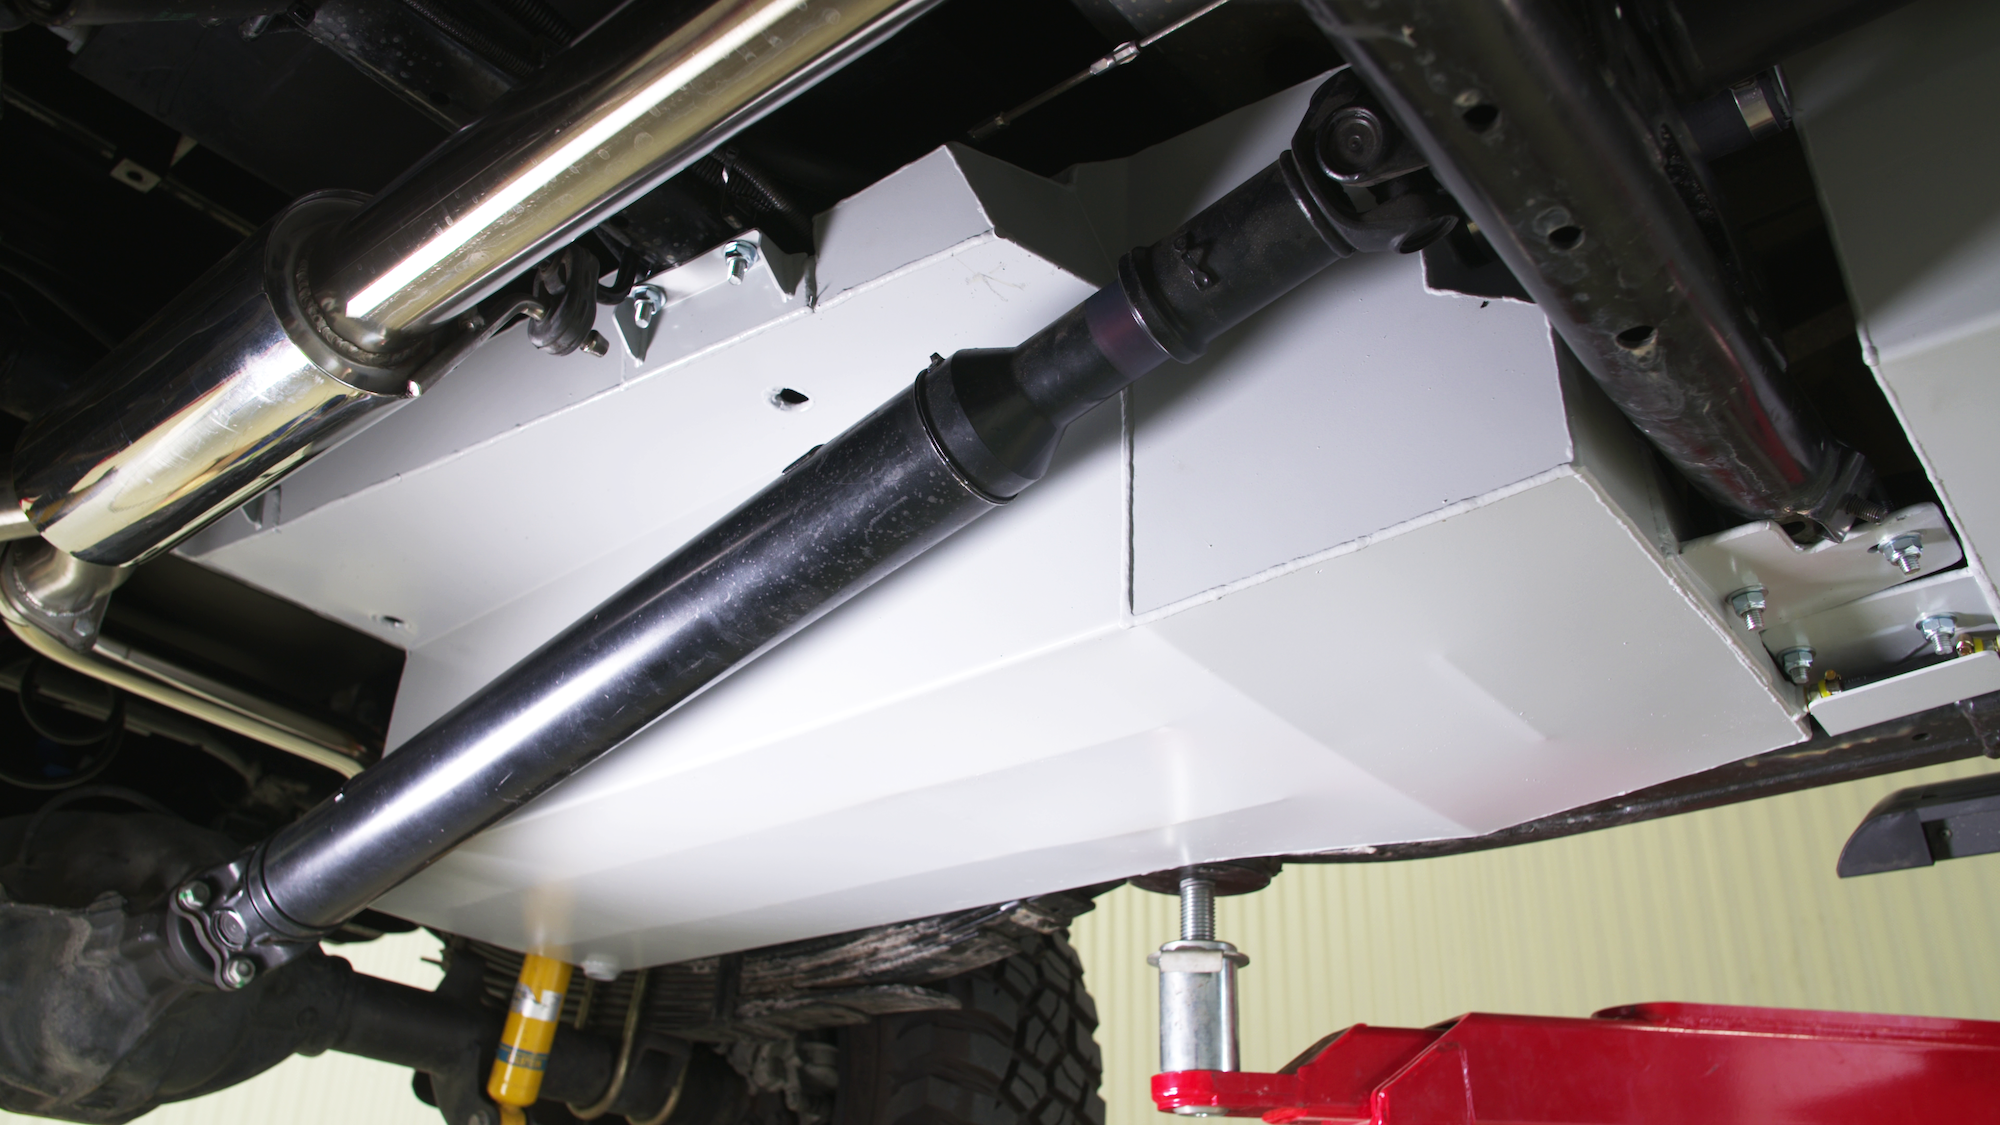
I’ve long been a fan of Out of Town 4WD Long Ranger tanks, so it made sense that I head to Barnsley (near Newcastle) to have the rig fitted up. Being an outback tourer, I obviously wanted more capacity than the 80-litre stock tank, but I didn’t want to go overboard. After all, every extra litre of diesel equals one more kilogram, so I had to have limits.
Ric Black from Out of Town threw around some ideas with me, and we settled on having two tanks mounted in the centre of the vehicle. One would replace the standard plastic tank, while the other would be a new one. Featuring a large linking pipe on the top, and a smaller one at the base, the tanks can be filled from the one filler, without the need for a transfer pump. The total capacity is 185 litres, which will give me a solid 1200-1500km range, depending on the conditions. She’s currently averaging around 13-litres per 100km.
Another big advantage with the Long Ranger tanks is that being made from 2mm aluminized steel, they can take a pounding and don’t rust. But importantly you can also drain the tanks. The new plastic tanks lack the strength to handle a thread, so if you get a bad batch of diesel, you have to remove the entire tank.
ROOF RACK, UHF & FINISHING TOUCHES
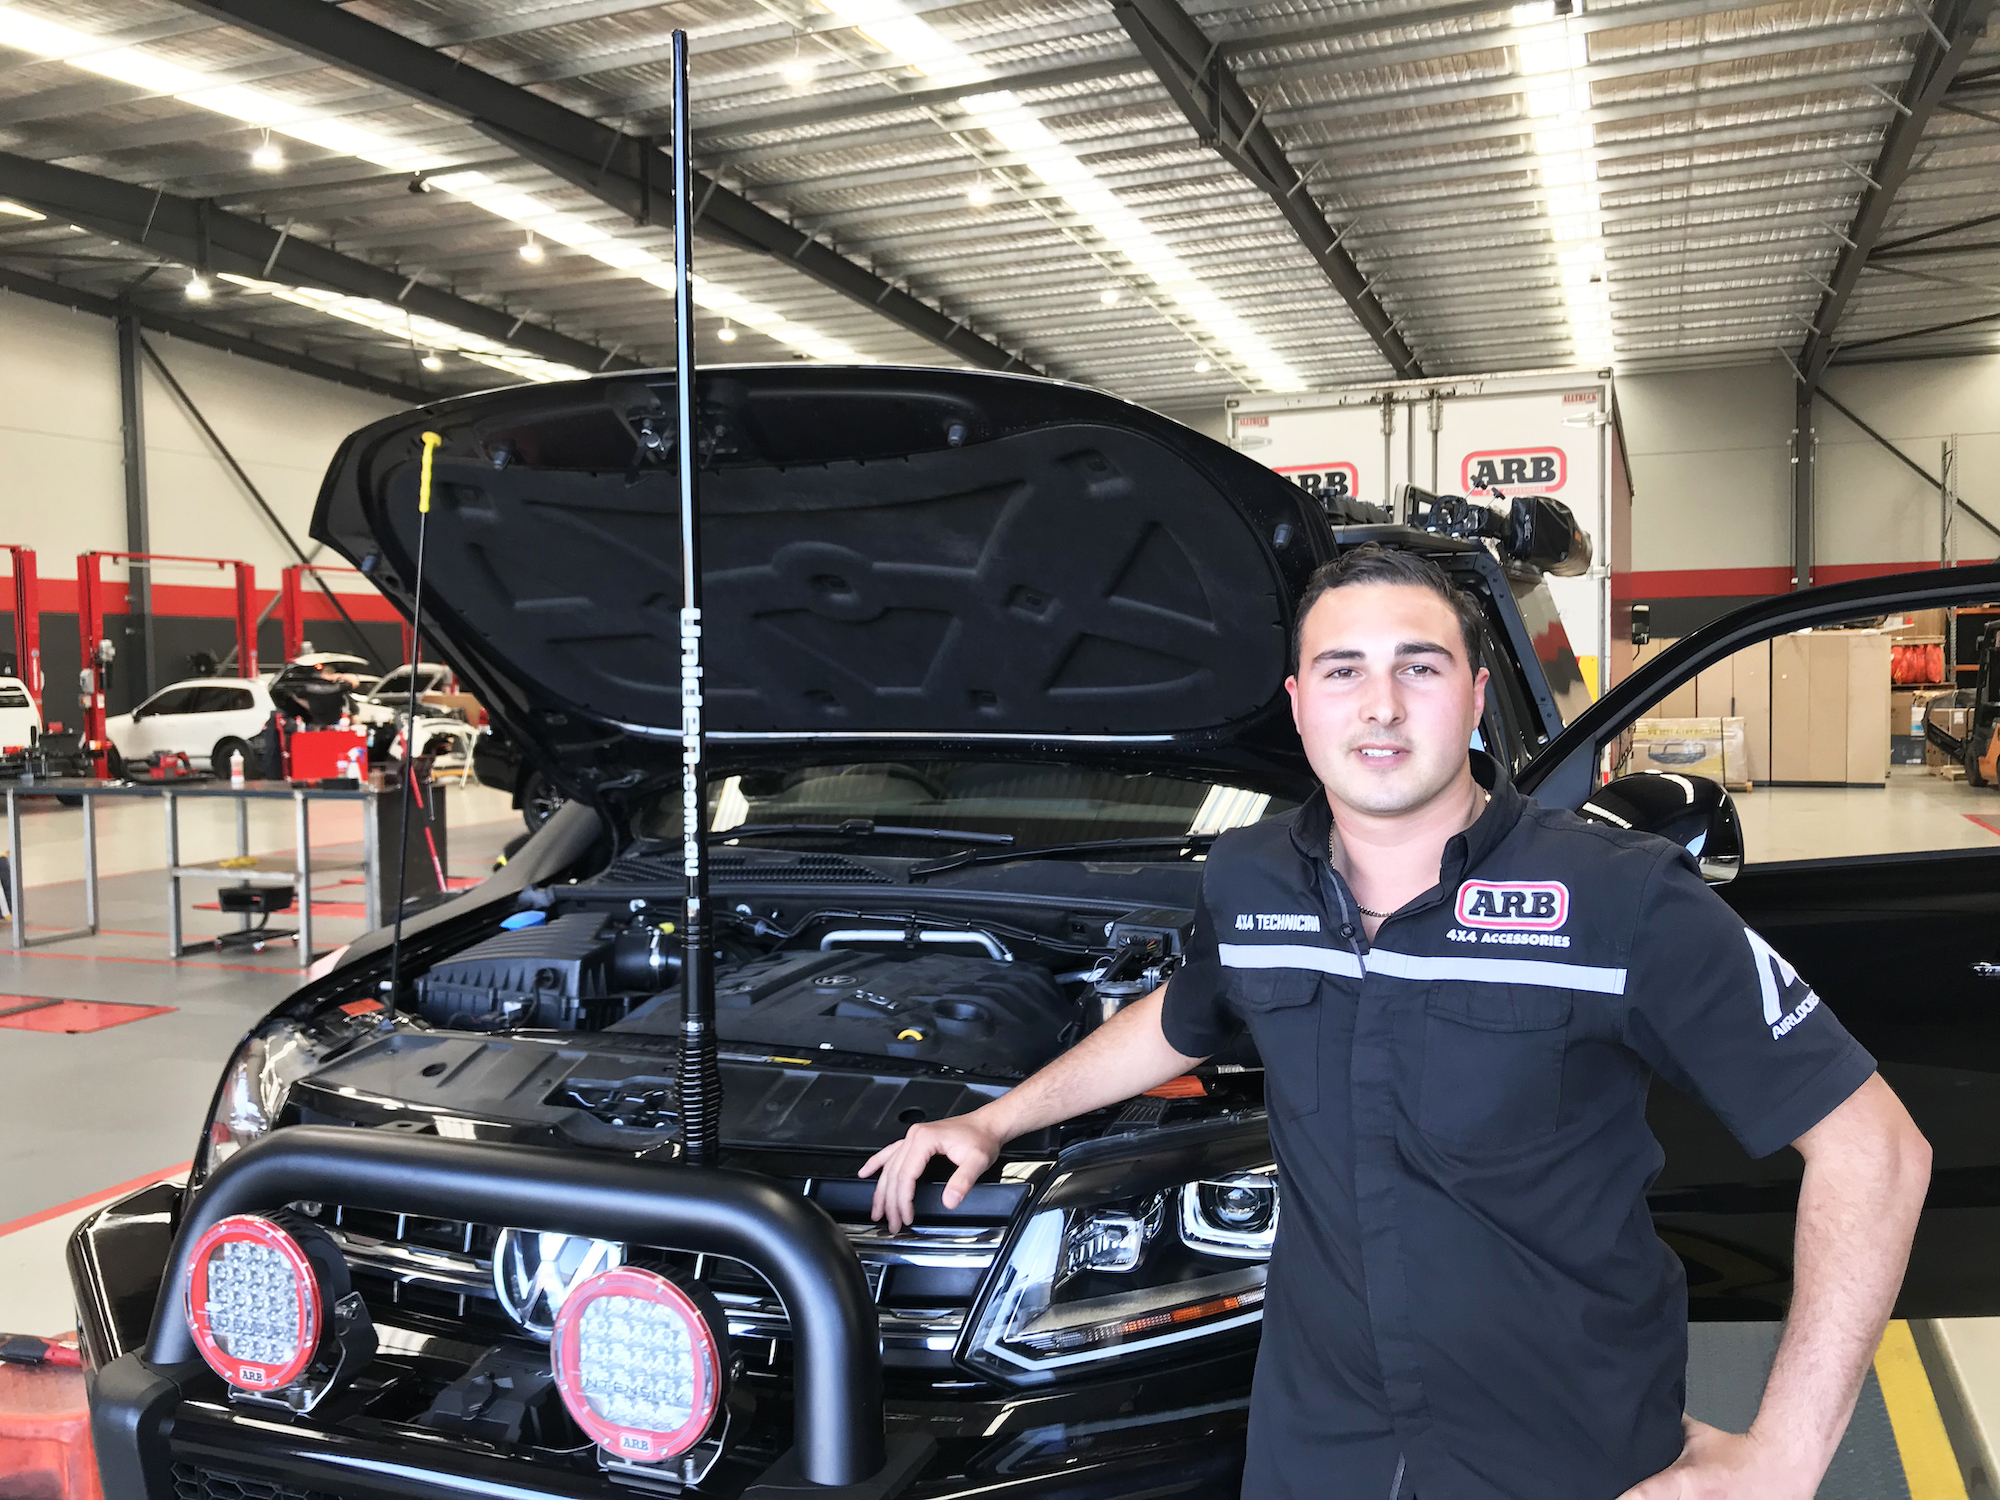
Undoubtedly the most impressive 4X4 store I’ve ever seen is at ARB Narellan. With its own weighbridge, masses of fitting bays and an incredible showroom, it’s the jewel in the ARB crown. Jessy and the team relished the opportunity to put the finishing touches on the Rok, and that began with the snorkel. It was a custom job, as they worked their way around the Bushwacker flares to fit the Safari Armax snorkel. This giant of a snorkel is designed not to restrict your intake, which is particularly handy if, like me, you’ve enhanced the power output. The fitment was first class.
The ARB Narellan team also installed the Uniden UHF 8060S. It’s a five-watt unit with a matching antenna and has around 18km of range. The antenna was a glossy black unit, and I soon discovered that with the Intensity roof lights switched on, I was getting plenty of reflection back into the cabin. The fix? My mates at DigitlFX (who did the vehicle wrap) supplied me with some matte black vinyl to attach to the rear of the aerial. Now it works a treat.
The Uniden UHF features a remote speaker microphone that was mounted on a custom bracket manufactured in-house at ARB Narellan, it’s a cracking unit. And the team has angled it nicely, so the screen faces the driver.
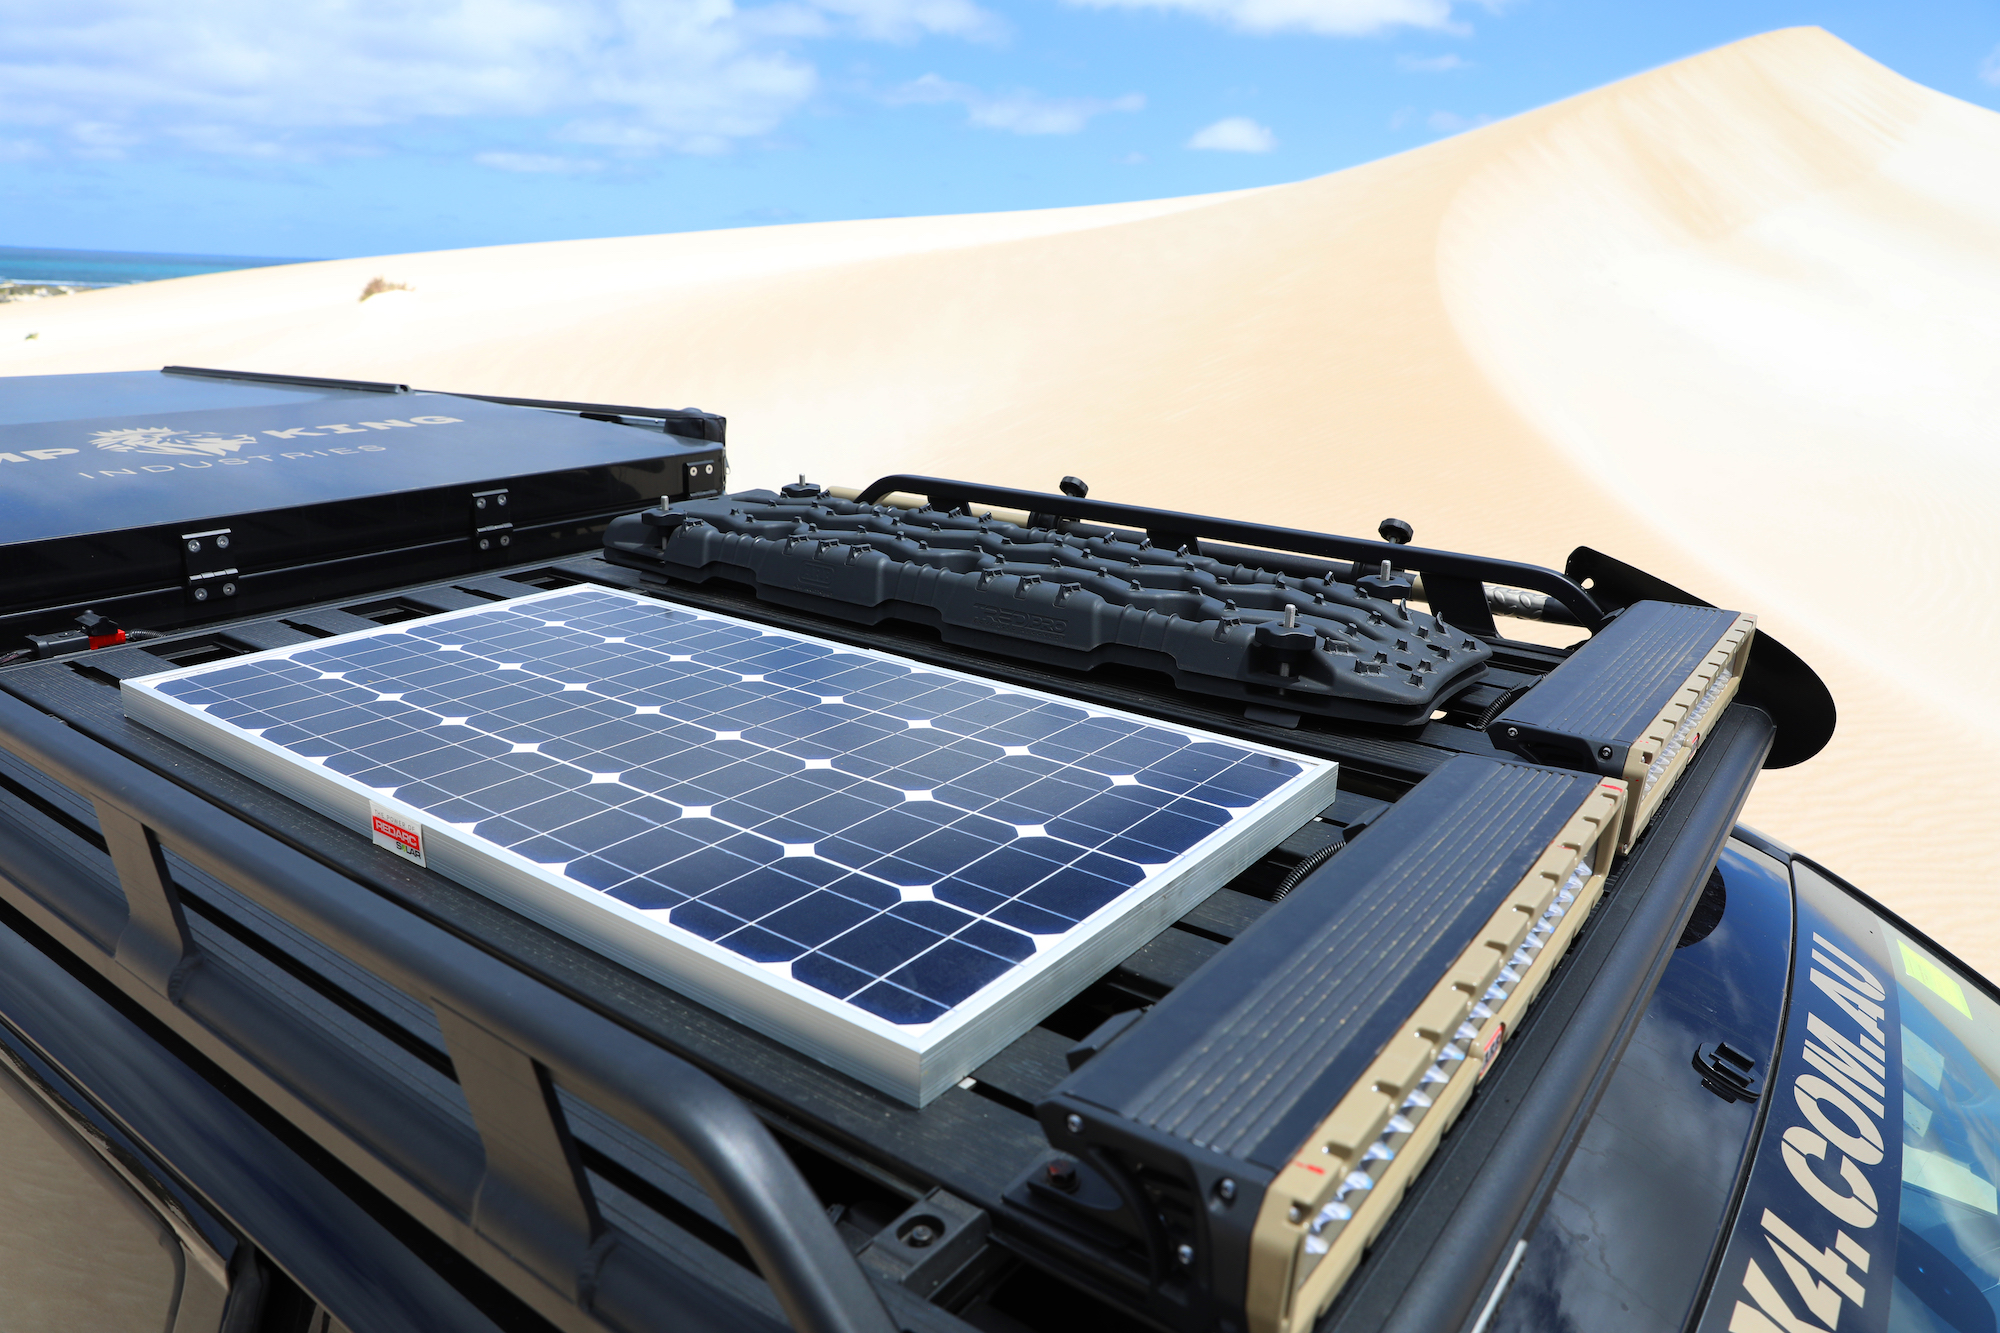
After scouring the market for roof racks for a few months, I settled on the Rhino Rack Tradesman roof rack. With its unique backbone design, it looks pretty damn awesome and is as sturdy as they come. I optioned it up with a shovel holder on the passenger side too.
On top, I’ve mounted a black pair of Tred Pros, which lock down nicely onto the deck via the Tred Pro mounting bracket. In my opinion, these are the pick of the recovery boards on the market right now (and I don’t say that just because they’re a sponsor). They grab the tread more effectively than others, and their raised lugs are seriously hardwearing.
Sitting astride the Tred Pros is a Redarc 80W monocrystalline fixed panel. At $265 this is a great price for a quality panel. I could have gone bigger, but I’ll carry with me a Redarc 150W solar blanket for those longer camps.
And to cap off the roof rack, we needed some serious flamethrowers, which was again taken care of by ARB. As well as the Intensity AR32 V2s on the bullbar, the ARB Narellan team planted a couple of Intensity AR40 light bars up on the roof. With all four lights powering at once, it really does give a great spread of light. I had initially wanted to mount the light bars beneath the rack to reduce wind resistance, but the ‘above the rack’ positioning has meant that I get no glare off the bonnet. And for driving around town, a set of black Intensity covers will ensure I don’t attract the eyes of the law.
The vehicle wrap was applied by Mark, Saj and the team at Digitlfx in Emu Plains. I threw Mark the keys and some logo’s and said ‘Make it clean and classy’. Of course, he did much more than that. The vinyl wrap really sets the vehicle off in my opinion, thanks largely to Mark’s brilliant design skills. And the Digitlfx team also made up signs for the coffee machine drawer, the shovel and the projector screen in the tent.
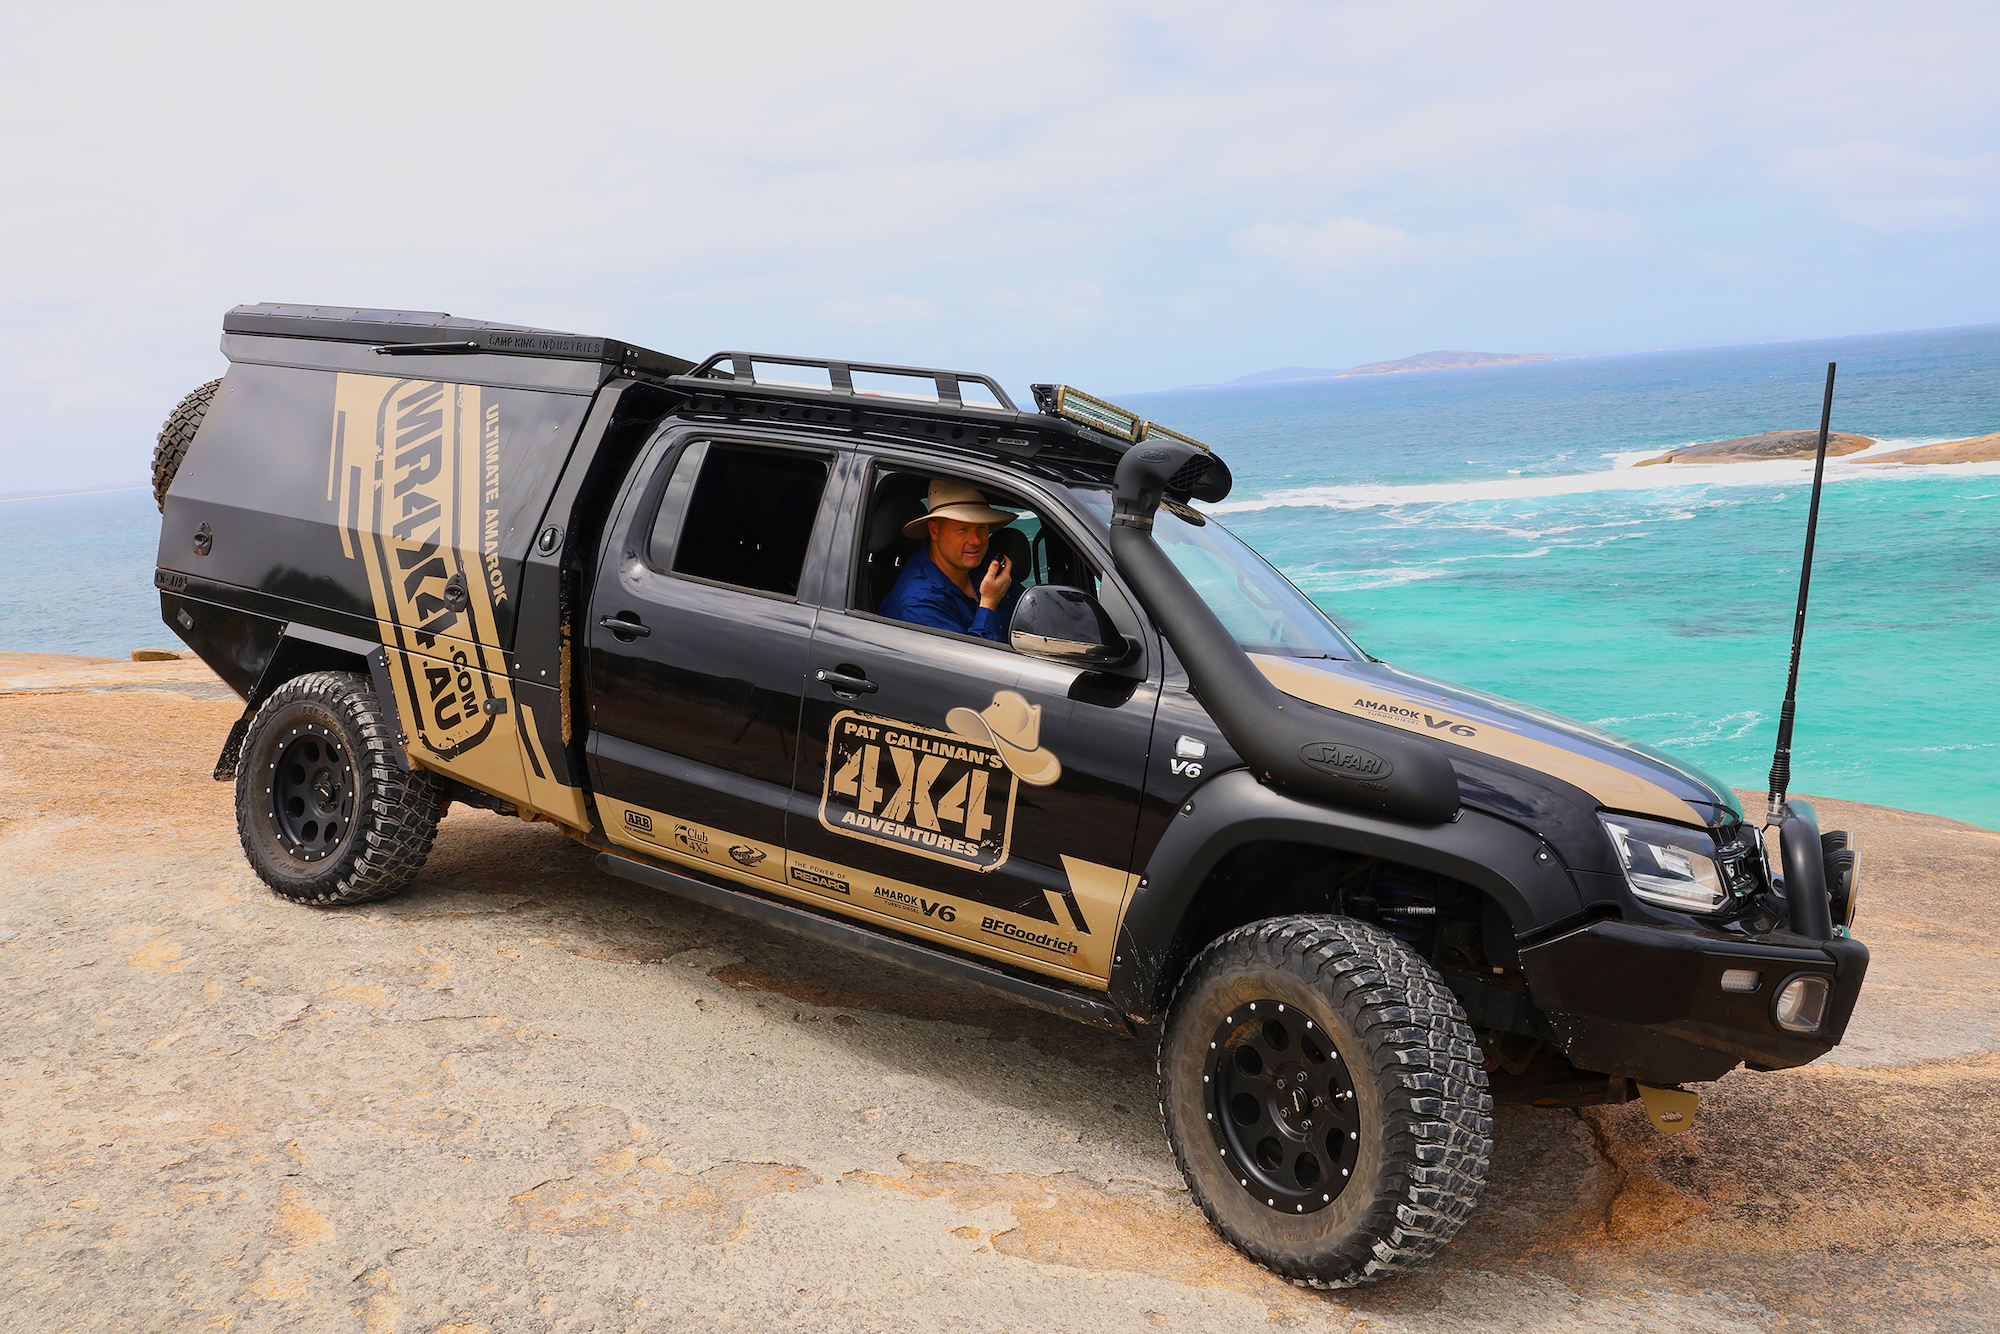
THE DRIVE
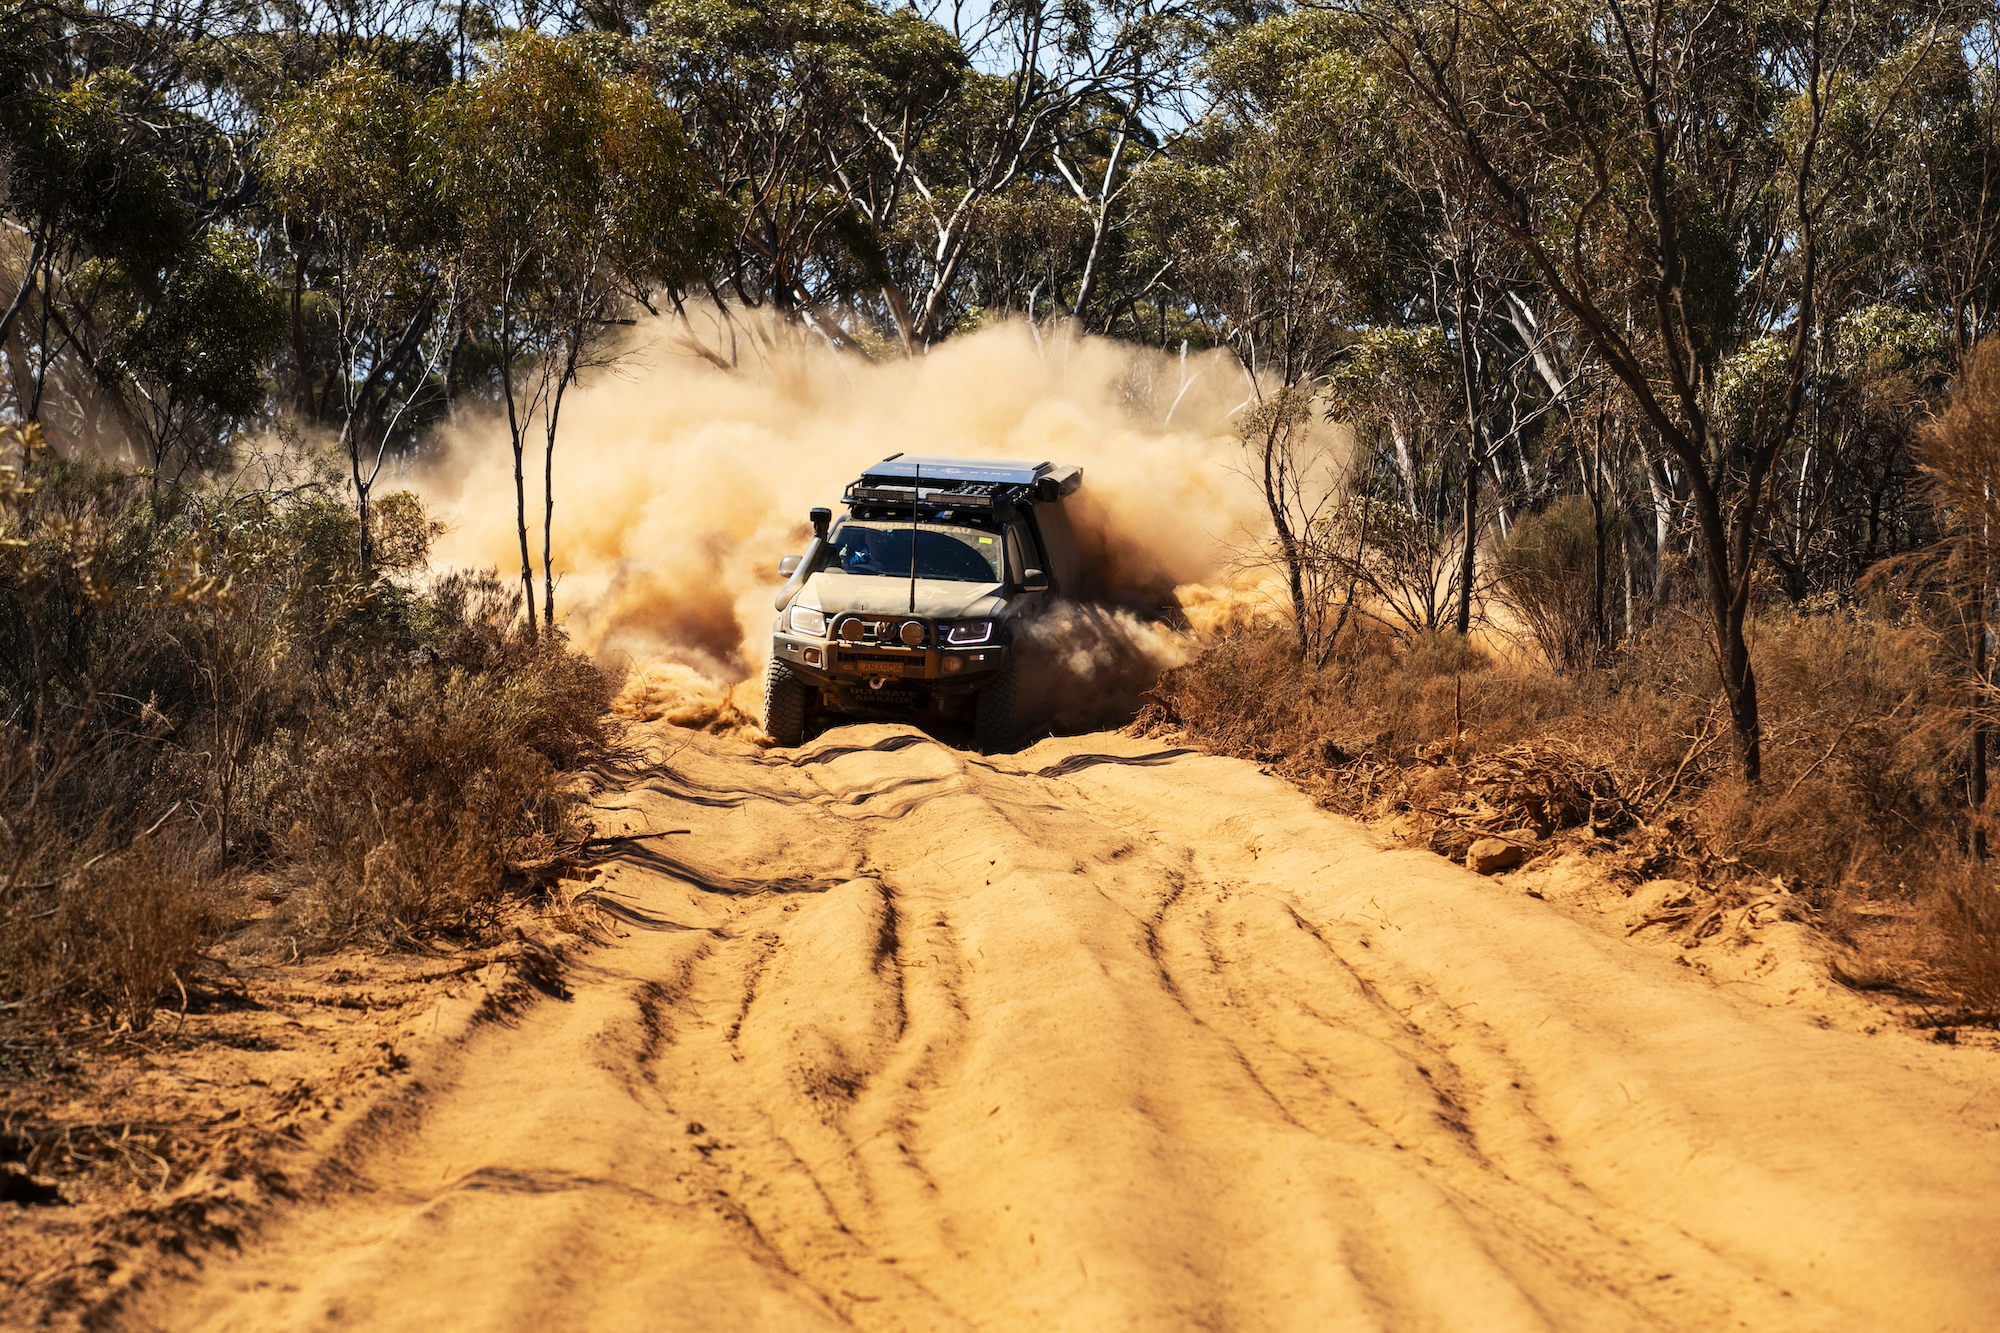
My son Bill and I took the Amarok on a christening run across the Nullarbor, with the odd offshoot down to Fowlers Bay and Esperance. The Amarok drove brilliantly. That longer wheelbase and more grunt make it an even more comfortable ride than the original. Sure, on tight tracks you need to be more aware of where your back tyres sit on the track, but that’s a small price to pay. I’ve never driven a lifted vehicle on 35s that handles like a regular height 4X4. It is genuinely astounding. So much so that I wish I could throw everyone the keys so they will believe me.
The feeling of getting up in the morning after a great night’s sleep, pouring a freshly ground coffee and hitting the tracks refreshed is just superb. And getting back to camp and flipping the beer tap for some sundowners – even better.
How much did it cost? I’m guessing around the $160K mark, but I haven’t completed a detailed tally just yet. When I do though, I’ll be posting it on mr4x4.com.au.
Thank you to all who made The Ultimate Amarok happen. We are indeed fortunate living in Australia, as not only do we have the best tracks to drive, we’ve also got the best engineers and designers of 4X4 accessories on the planet. My new 4X4 is testament to that. I hope you can come and see it in person as it does the rounds of the 4X4 shows, and don’t forget to keep an eye out for the documentary we’ve produced for Network TEN.
BIG THANKS!
ARB 4X4 Accessories – arb.com.au
Net 4X4 – Net4x4.com.au
Camp King Industries – CampKingIndustries.com.au
REDARC – Redarc.com.au
Adaptive Manufacturing (Chassis Extension) – Adaptivemanufacturing.com.au
Totally 12-Volt – Totally12Volt.com
ClearView – Clearviewaccessories.com.au
Beaudesert Exhaust – beauexhausts.com.au
Enkelman & Associates (Engineer) – aea.enkonet.com
Bushranger 4X4 Gear – Bushranger.com.au
Revolution Power Australia – Revolutionpoweraustralia.com.au
Webasto Australia – Webasto.com/au
ARB Moorebank – arb.com.au/stores/arb-moorebank
Direction Plus – Direction-plus.com
Uniden – Uniden.com.au
Delta 4X4 (wheels) – Delta4x4.com.au
ARB Narellan – arb.com.au/stores/arb-narellan/
Darche – Darche.com.au
Tred Pro – Tred4x4.com.au
Rhino Rack – Rhinorack.com.au
The Long Ranger – TheLongRanger.com.au
Steinbauer (Diesel Care) – dieselcare.com.au/service/steinbauer-power-modules
Advanced Installation Service – Advancedinstalls.com.au
Dean McElrea Electrical Services (240V install) – 0414 367 005
S&K Auto – 02 4739 6111
DigitlFX (vinyl wrap) – Digitlfx.com.au
Safari – Safari4x4.com.au