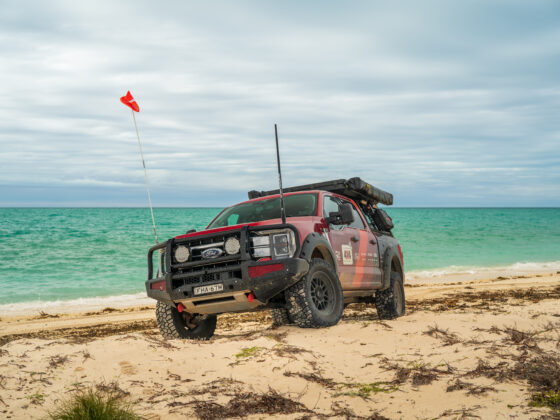

When it comes to the overall look and feel of any 4X4 it all comes down to that unmeasurable “vibe”, the mabo if you will. It’s more than just the sum of its parts, it’s how it all comes together. We’ve all seen those 4X4s with every accessory known to man hanging off every square inch, and they still somehow look like the vehicular equivalent of a middle manager in an accounting firm. The opposite is true sometimes too. You can have just a handful of mods, but the right colour, offset, accessory can make a mild 4X4 look like an absolute weapon. It’s this vibe we were chasing when we were coming to the tail end of the driveway build sessions on Pat’s Thirst Responder. Y’see, it had some seriously cool kit, custom suspension, a big dual battery install, some trick electric side steps from UpFitter and one of their tub racks as well for maximum storage. But it needed a little more. The answer was simple, bit wheels and tyres, but the execution? Well that was a little more complicated.
As we found ourselves doing many times through this build, we got on the blower with the team at UpFitter. They’re the local go-to mob for all things American Utes so knew they’d have the answer. They steered us towards their Bushwacker Pocket style flares to cover the F-150s new offset keeping things legal(ish) and visually adding width to the F-truck. After a couple of beers and an afternoon in the driveway, here’s how we got them on.
Laying It All Out
Before you get started, it’s worth taking 10 minutes to unpack everything, admire the flares, and lay out the gear. This is where you channel your inner pro and get organised.
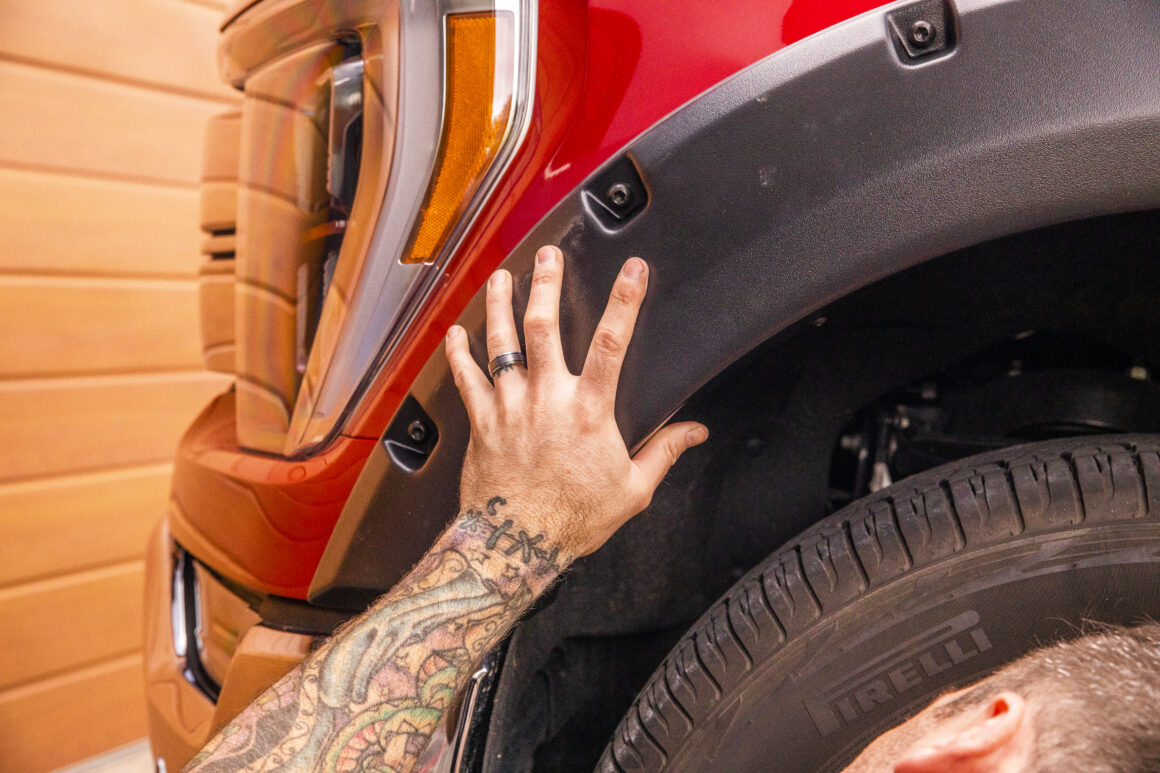
- Why Bushwacker? These flares are the OG of tyre coverage. Super tough, and unmistakably bold, they scream “I mean business.”
- Prep Time: Check the fit of the flares on your rig. Ours lined up perfectly with only minor nudging, but if you need to sand, trim, or file a bit, no dramas—it’s all part of the process.
- Get Your Tools Sorted: You’ll need basics like a drill, utility knife, a couple of sockets, and a grease pencil. If you’re anything like us, finding the tools took longer than the job itself.
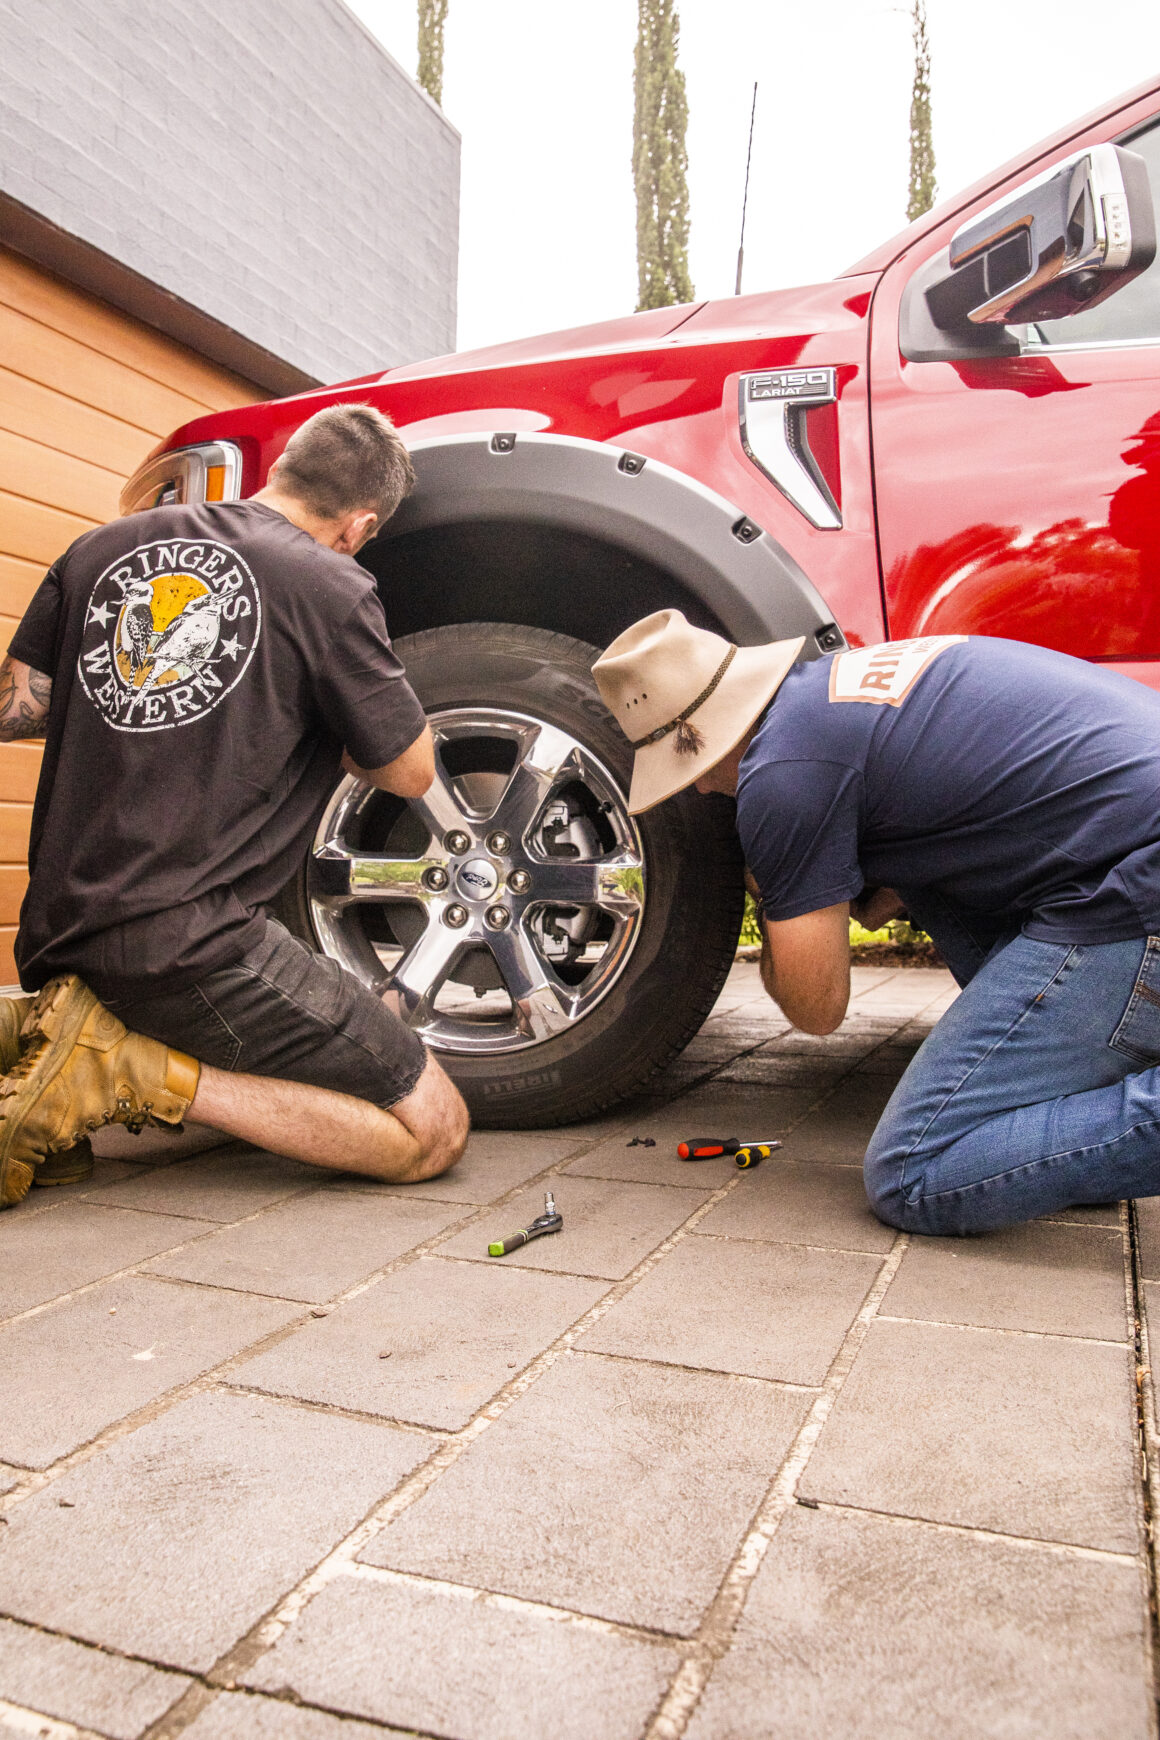
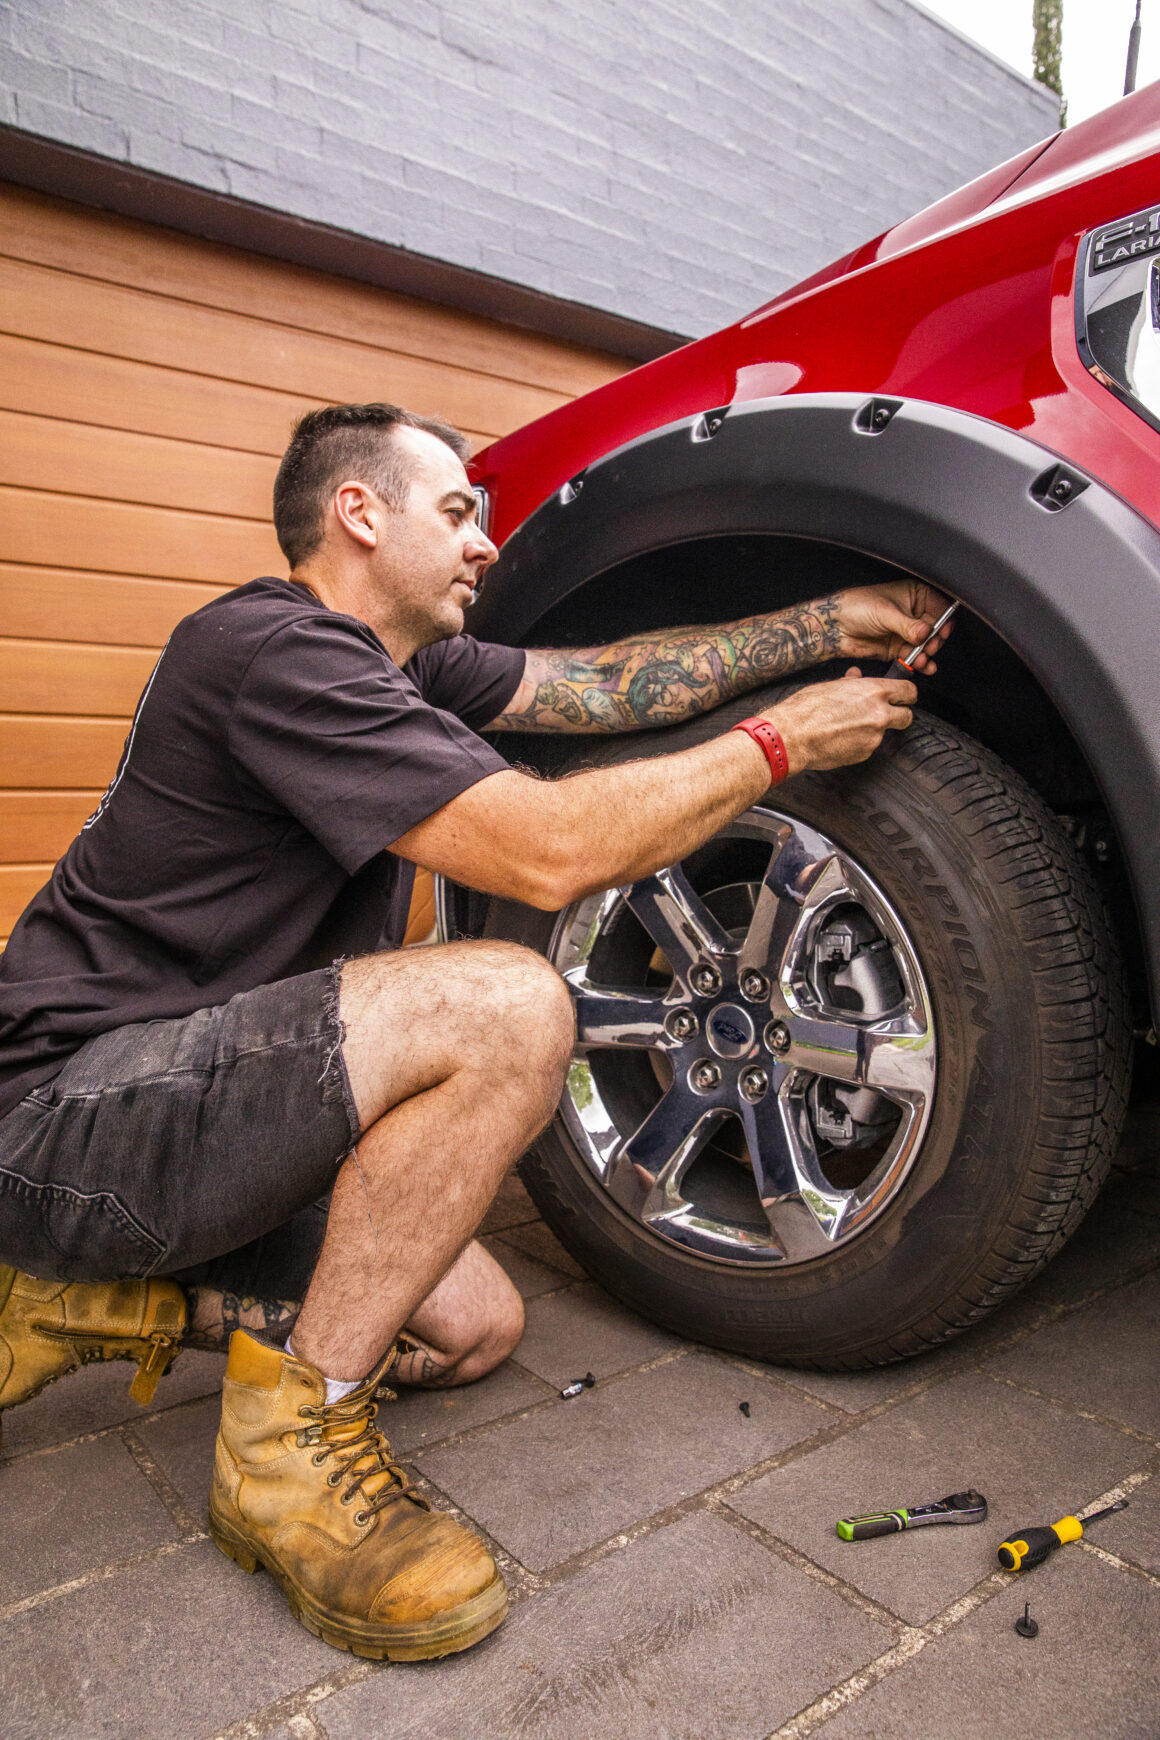
A Few Bolts and a Bit of Banter
The flares come with all the hardware you need, which is a lifesaver. Just pop a washer and bolt through each pocket hole (that classic Bushwacker look) and tighten them up with a mate holding the flare in place.
Front Flares:
- Start by removing a few factory screws, then clip the brackets onto the fender.
- Line up the flare, reuse the screws, and drill a small guide hole for the forward clip. It’s simple stuff—no swearing or head-scratching required.
- Screw everything back together, and voilà—the front end looks tough as nails.
Rear Flares:
- It’s the same story at the back: a couple of bolts out, line up the flare, mark the holes, snap on the clips, and secure the screws.
- We had the rears done in under 30 minutes, even with the occasional “Oi, stop hogging the socket set!” from the peanut gallery.
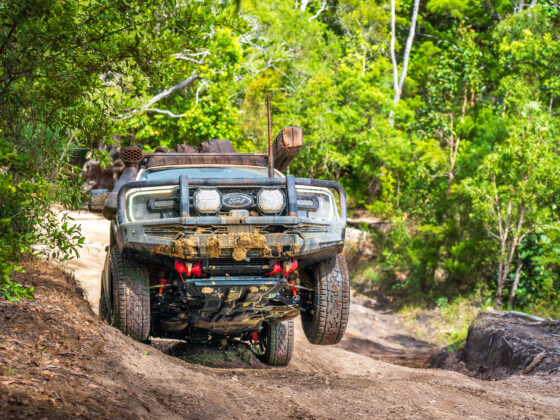
Trim for Those Big Tyres
Let’s be real—35s on 20-inch alloys don’t tuck themselves neatly into the arches. You might need to trim a little to make sure there’s no rubbing when you turn. A utility knife does the job perfectly.
Pro tip: Check your steering stops and bump stops if things are tight—it’s all about keeping your tyres and flares happy together.
Why UpFitter Gets a Shout-Out
When we lost the manual (classic), the legends at UpFitter sorted us out in no time. These guys have been our go-to for everything from the tub rack to power steps, and the Bushwacker flares were just the cherry on top of an already epic build. If you’re thinking about flares—or pretty much anything 4X4—they’ve got you covered.
Ready for the Outback
And just like that, Pat’s F-150 was one step closer to conquering the outback. A couple of hours, a bit of banter, and a few cold ones later, The Thirst Responder looked like it could take on anything (and keep the mud on the inside where it belongs). If you’re after a quick, easy mod to toughen up your rig and keep your tyres hidden under the body these Bushwacker flares from UpFitter are the way to go.
Now, onto the next job… or maybe just another beer.